Making bread at home is one of the most satisfying and rewarding culinary experiences. The warm, inviting aroma of freshly baked bread fills your kitchen, creating an atmosphere of comfort and joy.
However many people assume that bread baking is complicated or time-consuming. The truth is, with the right ingredients and techniques, anyone can bake delicious, homemade bread without special equipment or years of experience. You will really like it in the chicken Philly cheesesteak recipe
In this guide, we’ll break down everything you need to know about baking homemade bread, from selecting the best ingredients to mastering kneading techniques. Let’s dive into the world of baking and bring the art of homemade bread to your kitchen!
1. Introduction to Easy Homemade Bread
Benefits of Baking Bread at Home
Baking bread at home isn’t just about making food—it’s about creating something healthy, delicious, and full of love. Here’s why homemade bread is better than store-bought:
- Healthier Ingredients: Store-bought bread often contains preservatives, artificial flavors, and unnecessary sugar. When you bake at home, you control what goes into your bread.
- No Preservatives: Homemade bread is fresh and free from chemical additives that extend shelf life but may not be great for your health.
- Better Taste and Texture: Freshly baked bread has a soft interior and crispy crust, far superior to mass-produced options.
- Cost-Effective: A loaf of bread costs just a fraction of the price when made at home, using simple ingredients.
- A Therapeutic Process: Kneading dough is relaxing and rewarding, making baking a fun and creative experience.
- Endless Customization: You can create a variety of flavors, textures, and styles, from rustic sourdough to soft sandwich loaves.
Common Myths About Bread Baking
Many beginners avoid baking bread because of misconceptions. Let’s clear up some of the biggest myths:
“Bread baking is difficult.”
While it does require patience, the process is straightforward, especially with simple recipes.
“You need a bread machine.”
A bread machine is convenient, but traditional hand-kneading works just as well (if not better!).
“Homemade bread doesn’t stay fresh long.”
With proper storage, homemade bread can last several days and even be frozen for later use.
“You need expensive ingredients.”
Most homemade bread requires just flour, water, salt, and yeast—all affordable pantry staples.
Now that we’ve debunked these myths, let’s move on to the essential ingredients for the perfect loaf!
2. Essential Ingredients for Homemade Bread
Bread is made with just a few basic ingredients, but choosing the right ones makes a big difference in flavor and texture.
Choosing the Right Flour
Flour is the foundation of any bread. Here are the most common types used in bread baking:
- All-Purpose Flour: Great for soft sandwich bread and beginner-friendly recipes.
- Bread Flour: Has a higher protein content, creating a chewy, structured loaf with a good rise.
- Whole Wheat Flour: Adds nutrients and fiber, but produces a denser bread. Often mixed with white flour for balance.
- Rye Flour: Used in traditional rye and pumpernickel bread, providing a unique earthy flavor.
- Gluten-Free Flour: Blends like almond, rice, or oat flour are great for gluten-free diets but require binding agents like xanthan gum.
Pro Tip: Always sift your flour to avoid lumps and ensure even mixing.
The Role of Yeast, Water, and Salt
Each ingredient in bread dough plays a critical role:
- Yeast
- The key to rising bread, yeast feeds on sugar, releasing gas that makes the dough expand.
- Options include active dry yeast, instant yeast, and fresh yeast. Instant yeast is the easiest for beginners since it doesn’t require proofing.
- Water
- Hydrates the dough, allowing gluten to develop.
- Warm water (about 110°F or 45°C) helps activate yeast but shouldn’t be too hot, or it will kill the yeast.
- Salt
- Enhances flavor and controls yeast activity, preventing the dough from rising too fast.
- Avoid skipping salt, or the bread will taste bland and rise unpredictably.
Optional Ingredients for Extra Flavor
- Sugar or Honey: Adds a slight sweetness and feeds the yeast.
- Butter or Olive Oil: Improves texture and gives a rich, soft crumb.
- Milk or Eggs: Used in some recipes for extra moisture and tenderness.
By mastering these basic ingredients, you’re ready to start making the perfect bread dough.
Now that you know the essential ingredients, it’s time to start making the dough!
Baking bread is a step-by-step process, and each stage plays a crucial role in the final result. So, let’s walk through everything in a simple and easy-to-follow way.
3. Step-by-Step Guide to Making Bread Dough
Mixing and Kneading Techniques
First things first, let’s talk about mixing the ingredients. This is where the magic begins!
- Start with the dry ingredients
- In a large bowl, combine flour, salt, and yeast.
- If your recipe calls for sugar, add it now.
- Stir everything together so the ingredients are evenly distributed.
- Add the wet ingredients
- Slowly pour in warm water or milk.
- If using melted butter or oil, add it now.
- Mix until a dough forms
- Use a spoon or your hands to mix everything together.
- The dough will look messy at first, but don’t worry! It will come together soon.
Time to Knead!
Kneading is super important because it helps develop gluten, which gives bread its chewy texture.
- Lightly flour a clean surface.
- Place the dough on the floured area.
- Push the dough away with the heel of your hand, then fold it back over itself.
- Turn the dough slightly and repeat.
- Keep kneading for about 8-10 minutes.
How do you know if you’re done kneading? Here’s a quick test:
✔ The dough should feel smooth and elastic.
✔ Press your finger into the dough—if it springs back, it’s ready!
If kneading by hand sounds too tiring, you can use a stand mixer with a dough hook. Just mix for about 5-7 minutes on medium speed.
Proofing: How to Let Dough Rise Properly
Now, it’s time for the dough to rise and grow!
- Find a warm spot
- Yeast loves warmth, so place your dough in a slightly warm area.
- A good trick is to turn on your oven for 1-2 minutes, then turn it off and place the dough inside.
- Cover the dough
- Use a damp towel or plastic wrap to keep the dough from drying out.
- Let it rise until doubled in size
- This usually takes about 1-2 hours, depending on room temperature.
Why is this step so important? Because it allows the yeast to create air pockets, which make the bread light and fluffy!
Once the dough has doubled, punch it down gently to release air bubbles. Then, shape it into a loaf or rolls, depending on what type of bread you’re making.
Now, let’s move on to the baking process!
4. Baking and Cooling Your Bread
Oven Temperature and Baking Time
Baking is where all your hard work finally pays off!
- Preheat your oven
- This step is crucial! A properly heated oven ensures even baking.
- Most bread recipes bake at 375–450°F (190–230°C).
- Prepare the baking pan
- If making a loaf, place the shaped dough in a greased loaf pan.
- If baking rolls, place them on a baking sheet with some space in between.
- Bake until golden brown
- Depending on the type of bread, baking can take 25–45 minutes.
- A good way to check doneness is by tapping the bottom of the loaf—if it sounds hollow, it’s ready!
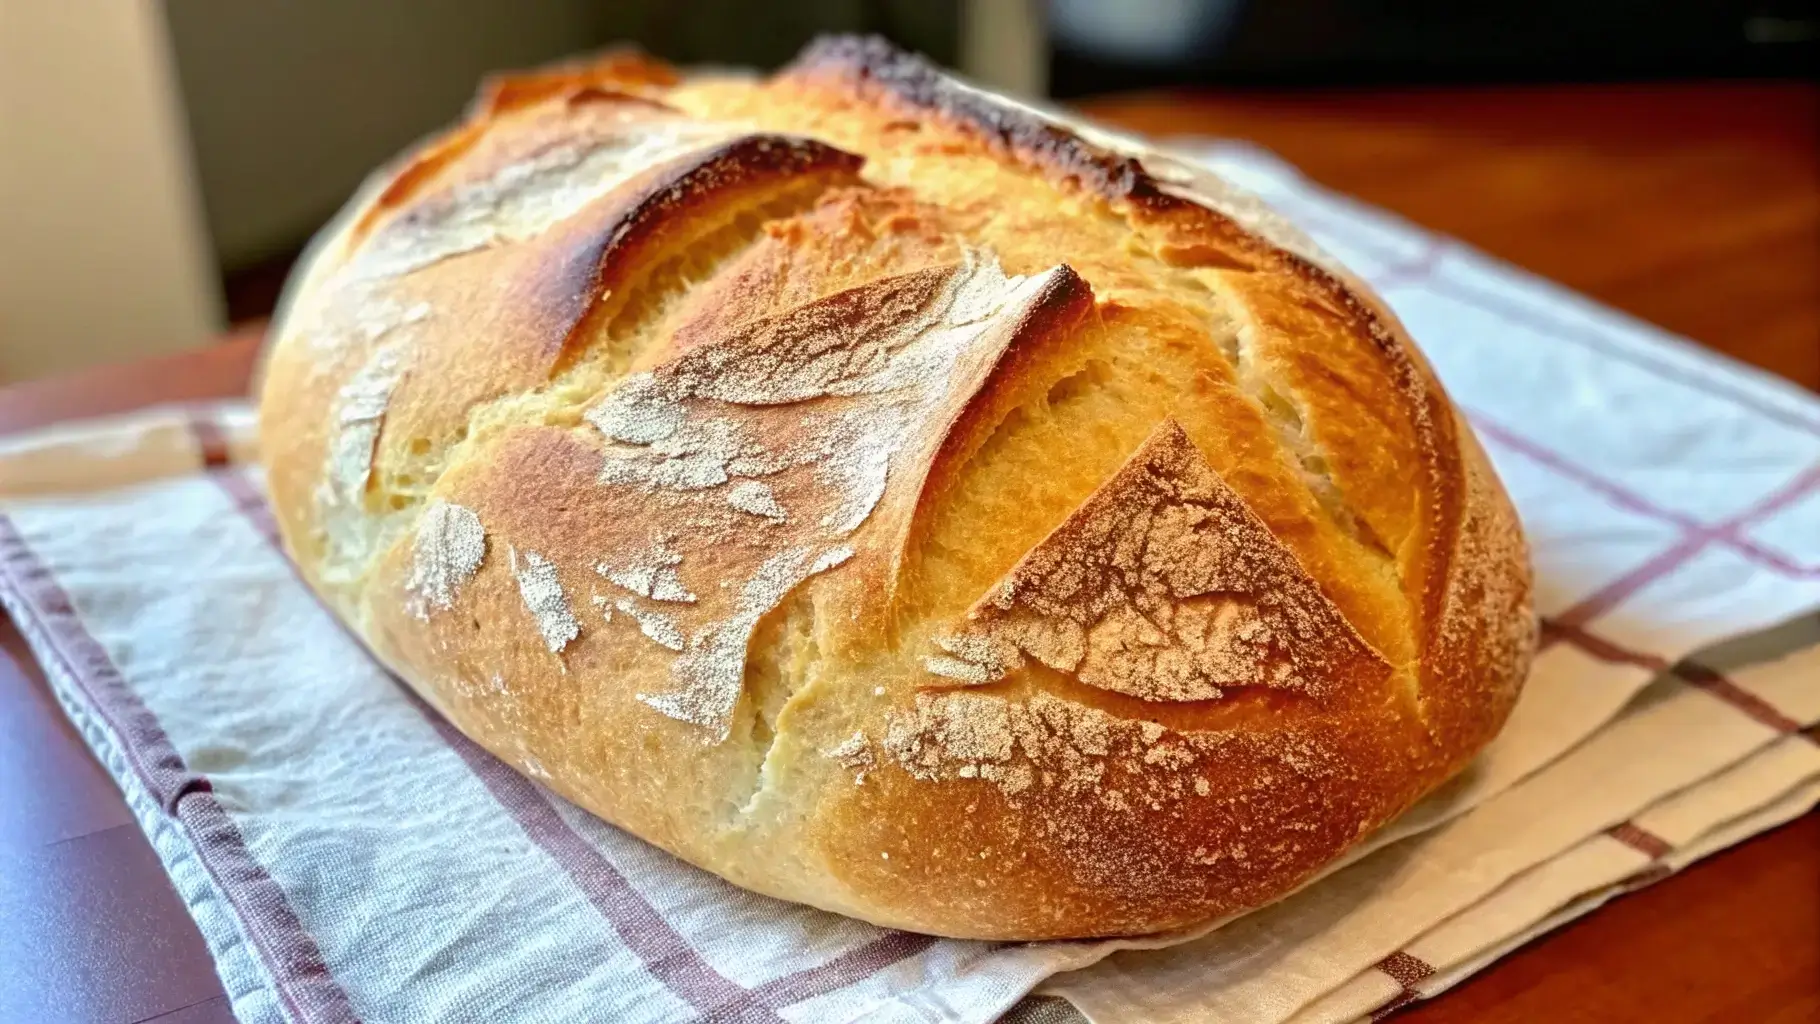
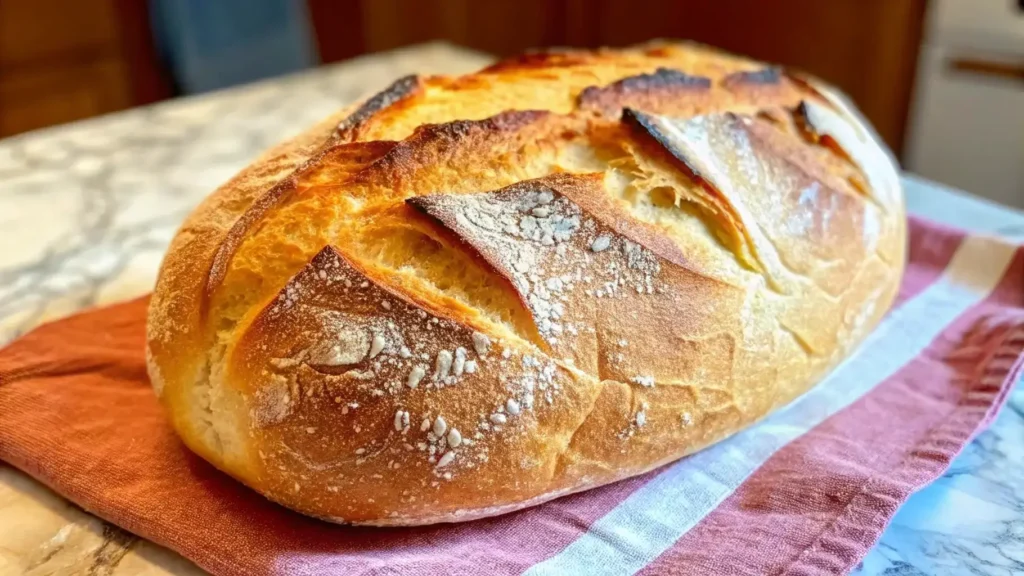
How to Achieve a Crispy Crust
Want that golden, crispy crust like bakery-style bread? Try these simple tricks:
Use steam
- Place a pan of hot water in the oven while baking.
- This keeps the dough moist and helps form a crunchy crust.
Brush with water or egg wash
- Brushing the surface with water before baking creates a crusty exterior.
- For a shiny finish, use an egg wash (a mix of egg and water).
Let it cool properly
- Resist the urge to cut into the bread right away!
- Cooling allows the inside to set and prevents it from getting gummy.
Pro Tip: Place the bread on a wire rack and let it cool for at least 30 minutes before slicing.
Now that you’ve mastered mixing, kneading, and baking, it’s time to get creative with flavors!
But before we dive into that, let’s also talk about the best ways to store your homemade bread so it stays fresh for as long as possible.
5. Variations and Flavor Enhancements
Once you feel comfortable with a basic bread recipe, you can start experimenting with different ingredients to make your bread even more delicious.
Adding Herbs, Cheese, and Seeds
If you want to add more flavor and texture to your bread, here are some fun ingredients to try:
✔ Herbs: Fresh or dried herbs like rosemary, thyme, oregano, or basil can add a wonderful aroma and taste. Just mix them into the dough before kneading.
✔ Cheese: Grated cheddar, parmesan, or mozzarella gives bread a rich, cheesy flavor. Try adding cheese inside the dough or sprinkling some on top before baking.
✔ Seeds: Add a handful of sunflower seeds, flaxseeds, sesame seeds, or pumpkin seeds for extra crunch. You can also roll the dough in seeds before baking for a decorative crust.
✔ Garlic & Onion: Minced garlic or dried onion flakes bring a savory touch, perfect for a garlic bread loaf or dinner rolls.
Making Sweet vs. Savory Bread
Depending on what you’re in the mood for, you can make your bread sweet or savory by adjusting the ingredients.
- For Sweet Bread:
- Add sugar, honey, cinnamon, nutmeg, or vanilla.
- Try mixing in raisins, dried cranberries, or chocolate chips.
- Swirl in some cinnamon-sugar filling for a delicious breakfast bread.
- For Savory Bread:
- Use cheese, olives, sundried tomatoes, or jalapeños.
- Add a pinch of black pepper or chili flakes for a little spice.
- Try mixing in mashed potatoes for a soft and fluffy texture.
With so many options, you can make a different type of bread every time!
6. Storing and Preserving Homemade Bread
Now that you’ve baked your perfect loaf, you’ll want to keep it fresh for as long as possible.
Best Storage Methods to Keep Bread Fresh
Unlike store-bought bread, homemade bread doesn’t have preservatives, so it can dry out quickly. Here’s how to store it properly:
At Room Temperature:
- Wrap the bread in a clean kitchen towel or store it in a paper bag.
- Keep it in a cool, dry place, away from direct sunlight.
- Avoid plastic bags, as they trap moisture and can make the bread soggy.
In a Bread Box:
- If you have one, a bread box is great for keeping bread fresh for 3–5 days.
Avoid the Refrigerator:
- Many people think storing bread in the fridge keeps it fresh, but it actually makes it stale faster!
Freezing and Reheating Tips
If you’ve baked extra loaves or just want to save some bread for later, freezing is a great option.
To Freeze Bread:
- Let the bread cool completely.
- Wrap it tightly in plastic wrap and then in aluminum foil.
- Store in a sealed freezer bag for up to 3 months.
To Reheat Frozen Bread:
- Let it thaw at room temperature for a few hours.
- For a crispy crust, warm it in the oven at 350°F (175°C) for 10–15 minutes.
For Sliced Bread:
- You can freeze individual slices and toast them directly from the freezer—super convenient for breakfast!
Final Thoughts
Making homemade bread is easier than you think, and with a little practice, you’ll be baking like a pro.
From the basic ingredients to delicious flavor variations and the best storage tips, you now have all the knowledge you need to enjoy fresh, homemade bread whenever you want.
So, why not start baking today? Once you taste warm, homemade bread, you’ll never want to go back to store-bought!
More FAQs
Here are some common questions about homemade bread:
1. Why didn’t my bread rise?
Your yeast may be expired, or your water might have been too hot or too cold. Try proofing the yeast before mixing.
2. How do I make bread softer?
Use a bit of butter, milk, or eggs in the dough for a softer texture.
3. How do I get a golden crust?
Brush the top with an egg wash or milk before baking.
4. Can I use whole wheat flour instead of white flour?
Yes, but whole wheat flour makes bread denser, so you may want to mix it with white flour.
5. How can I make gluten-free bread?
Use a gluten-free flour blend and add xanthan gum for structure.
6. Why is my bread too dry?
You might have added too much flour. Try using a bit more water next time.
7. Can I make bread without yeast?
Yes! Try making quick bread using baking powder or baking soda instead.
8. How do I store leftover dough?
You can refrigerate dough for up to 3 days before baking.
9. What’s the best way to slice homemade bread?
Use a serrated bread knife and let the bread cool completely before cutting.
10. Can I bake bread in a slow cooker?
Yes! Place the dough in a greased slow cooker and cook on high for 2–3 hours.
Now you’re all set to bake, store, and enjoy your homemade bread! Happy baking!