The Ultimate Guide to Anise Cookies: Recipes, Tips, and Traditions

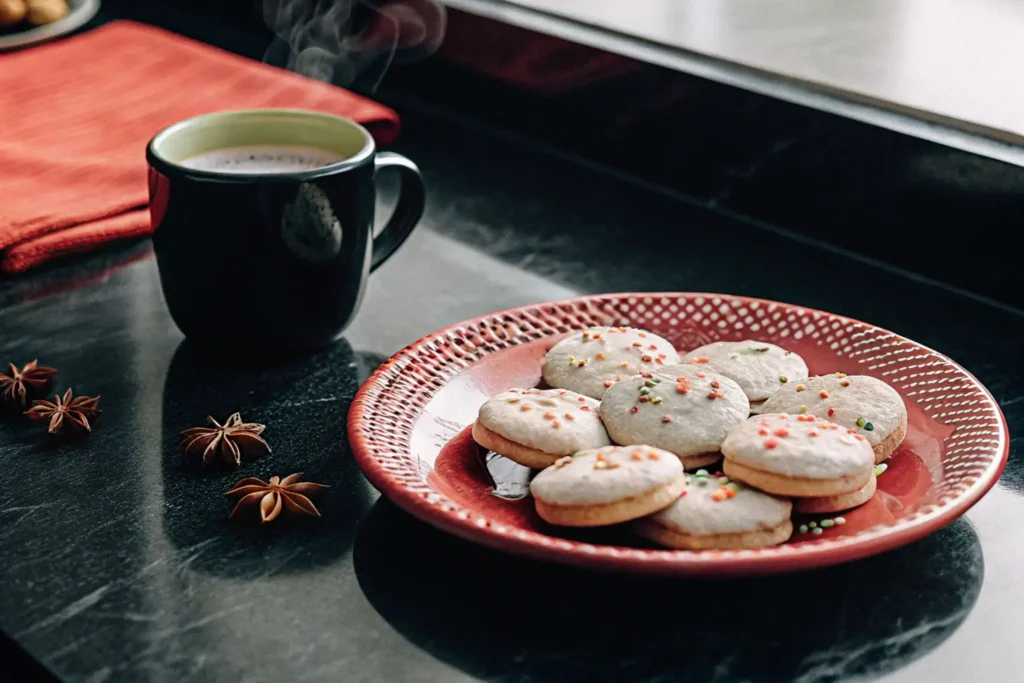
A plate of anise cookies with a cup of hot chocolate and star anise on a counter.

Introduction to Anise Cookies

Anise cookies are a delightful and traditional treat known for their unique, aromatic flavor derived from anise seeds or extract. These cookies have been enjoyed across cultures for centuries, adding a touch of nostalgia and distinct taste to celebrations and everyday moments.

The history of anise-flavored desserts can be traced back to ancient civilizations. Anise, often confused with licorice or fennel, was a prized spice in Greek and Roman cuisine. It was used for both its sweet, aromatic properties and its perceived medicinal benefits. Over time, anise became a key ingredient in many traditional European baked goods, including Italian biscotti, German springerle, and Spanish anise pastries. These desserts remain staples during holidays, weddings, and family gatherings worldwide.


A baking tray with freshly baked Christmas Anise Cookies decorated with icing and sprinkles, with star anise and lemon slices in the background.

The Unique Flavor of Anise

What is Anise?

Anise is a flowering plant native to the Mediterranean and Southwest Asia. Its small, brown seeds are packed with a sweet, licorice-like flavor that lends itself beautifully to desserts and beverages. The taste of anise comes from anethole, an aromatic compound also found in fennel and star anise.

Anise vs. Fennel vs. Licorice

While the flavors of anise, fennel, and licorice may seem similar, they have distinct differences:

  • Anise: Has a sweeter, more intense licorice flavor, perfect for baking.
  • Fennel: Offers a milder, earthier profile and is often used in savory dishes.
  • Licorice: Refers to both the root of the licorice plant and the extract, which has a stronger, more herbal taste.

The balance of sweetness and spice in anise makes it a versatile ingredient in cookies, candies, and liqueurs.


Classic Italian Anise Cookies (Anisette Cookies)

Italian anisette cookies are soft, slightly sweet treats with a distinct anise flavor. Traditionally served during Christmas and Easter, they are often topped with a light sugar glaze and colorful sprinkles. These cookies are a staple at Italian weddings and family gatherings.

German Springerle Cookies

Springerle cookies are a beloved German treat dating back to the Middle Ages. Known for their intricately embossed patterns, these cookies are made with anise seeds, flour, sugar, and eggs. The dough is pressed into decorative molds or carved wooden rollers before being baked. The result is a firm, subtly sweet cookie that pairs perfectly with tea or coffee.

These traditional recipes highlight the timeless appeal of anise cookies across cultures.


Ingredients Needed for Anise Cookies

To bake the perfect anise cookies, you’ll need a few key ingredients:

  • Anise seeds or anise extract: These are the stars of the show, providing the signature flavor.
  • Flour: All-purpose flour works best for a soft or crunchy texture.
  • Sugar: Adds sweetness and helps with browning.
  • Eggs: Essential for structure and moisture.
  • Butter or oil: Adds richness and ensures a tender crumb.
  • Baking powder: For leavening, giving the cookies a light, airy texture.

Substitutions for Unique Flavors

  • Replace anise extract with star anise powder for a slightly spicier flavor.
  • Add citrus zest (like lemon or orange) to complement the anise aroma.
  • Use almond extract alongside anise for a richer, layered taste.

These simple ingredients create a versatile base that can be customized to suit any preference.


Step-by-Step Guide to Baking Anise Cookies

Baking anise cookies is a fun and rewarding process. Here’s a step-by-step guide to help you master the recipe:

1. Mixing the Dough

  • Traditional Method: Combine butter and sugar until light and fluffy. Add eggs one at a time, then mix in anise extract or seeds. Gradually incorporate the dry ingredients (flour and baking powder) until a soft dough forms.
  • Modern Method: For convenience, use a stand mixer to streamline the mixing process. This ensures a smooth and consistent dough.

2. Chilling the Dough

  • Chill the dough for at least 30 minutes to allow the flavors to meld and to make it easier to handle.

3. Shaping the Cookies

  • For drop cookies: Scoop spoonfuls of dough onto a parchment-lined baking sheet.
  • For rolled cookies: Roll out the dough and use cookie cutters or Springerle molds for decorative shapes.

4. Baking

  • Bake the cookies at 350°F (175°C) for 10-12 minutes or until the edges are golden brown.

5. Cooling and Decorating

  • Allow the cookies to cool before adding icing, sprinkles, or a simple sugar glaze.

Choosing Between Anise Extract and Anise Seeds

Pros and Cons of Anise Extract

  • Pros: Provides a strong, concentrated flavor that’s easy to measure and mix into the dough.
  • Cons: Can be overpowering if not used carefully.

Pros and Cons of Anise Seeds

  • Pros: Offer a more subtle, earthy flavor and add texture to the cookies.
  • Cons: Need to be ground or infused for a balanced taste.

Combining Both for Balance

For the perfect flavor, try using both:

  • Add anise seeds for texture.
  • Include anise extract for a burst of aroma and sweetness.

This combination enhances the overall taste without overwhelming the palate.


Tips for Perfect Anise Cookies

1. Achieving the Ideal Consistency

  • For soft cookies: Use shorter baking times and add a bit more butter to the dough.
  • For crunchy cookies: Extend the baking time slightly and roll the dough thinner.

2. Preventing the Dough from Spreading

  • Chill the dough before baking.
  • Use parchment paper or a silicone baking mat to ensure even baking.
  • Avoid over-mixing, which can cause the dough to lose structure.

These tips guarantee cookies with a consistent texture and a delicious flavor.


Variations of Anise Cookies

Soft Anise Drop Cookies

These pillowy cookies are quick to make and perfect for a casual treat. They’re soft, slightly sweet, and topped with a light glaze.

Gluten-Free Anise Cookies

For a gluten-free option, substitute all-purpose flour with a gluten-free flour blend. Add a teaspoon of xanthan gum to ensure the dough holds together.

These variations allow you to enjoy anise cookies regardless of dietary preferences.


Cultural Significance of Anise Cookies

Italian Celebrations

In Italy, anise cookies are a symbol of festivity. They are served during weddings, Christmas, and Easter. The cookies often feature bright decorations and are gifted as a gesture of love and goodwill.

German and Spanish Traditions

In Germany, springerle cookies are prepared during Christmas and are considered a family heirloom recipe. Similarly, in Spain, Polvorones de Anís are a traditional treat enjoyed during holidays.

These cultural connections highlight the timeless appeal of anise cookies in celebrations around the world.


Decorating Anise Cookies

Simple Techniques

  • Use a light sugar glaze for a shiny, sweet coating.
  • Add sprinkles or colored sugar for a festive touch.

Holiday-Themed Decorations

  • For Christmas, decorate the cookies with red and green icing.
  • For Easter, use pastel colors and intricate patterns.

With a little creativity, you can turn anise cookies into beautiful treats for any occasion.


Baking Tools and Equipment Needed

Before you start baking anise cookies, it’s essential to have the right tools on hand. Having the proper equipment will make the process easier and ensure professional-quality results.

Must-Have Tools

Here’s what you’ll need:

  • Cookie sheets: Use non-stick or line them with parchment paper for easy cleanup.
  • Mixing bowls: A set of different-sized bowls for combining wet and dry ingredients.
  • Rolling pin: If you’re making Springerle cookies or rolled-out designs.
  • Measuring cups and spoons: Precision is key when baking cookies.
  • Piping bags: Useful for decorating cookies with icing.

Specialty Molds for Springerle Cookies

For traditional German Springerle cookies, wooden or silicone molds are used to create intricate patterns. These molds can be found online or in specialty kitchen stores. Simply press the dough into the mold, carefully release it, and bake.

Using these tools ensures your anise cookies are perfectly shaped, textured, and ready to impress at any gathering.


Health Benefits of Anise

Believe it or not, anise isn’t just flavorful—it also comes with several health benefits. Let’s take a closer look at why incorporating anise into your desserts might be a good idea.

Digestive Benefits

Anise seeds have been used for centuries to aid in digestion. They contain natural oils that help:

  • Relieve bloating and indigestion
  • Soothe upset stomachs
  • Reduce gas after heavy meals

This is one reason why many cultures enjoy anise-flavored desserts after large feasts.

Nutritional Value

Anise is also low in calories but rich in key nutrients:

  • Iron: Supports red blood cell production.
  • Calcium: Promotes bone health.
  • Vitamins A and C: Offer antioxidant properties to protect the body.

Adding anise to your cookies isn’t just tasty—it’s a small step toward healthier indulgence!


Pairing Anise Cookies with Beverages

Now that you’ve baked your perfect anise cookies, you might be wondering: what drinks pair well with them? Here are some classic and creative options:

Coffee and Espresso

In Italy, anise cookies are often served with espresso or coffee. The strong, bitter notes of espresso perfectly complement the sweet, licorice flavor of the cookies. Pairing them together makes for an authentic Italian experience.

Tea Pairings

  • Black tea: Its robust flavor pairs well with the sweetness of the cookies.
  • Herbal teas: Try pairing chamomile or mint tea for a soothing afternoon treat.

Dessert Wines

If you’re serving anise cookies after dinner, pair them with:

  • A light Moscato wine, which enhances their sweetness.
  • Sherry or port, which balance the anise flavor beautifully.

With these beverage pairings, anise cookies become the perfect treat for any time of day.


Anise Cookies for Special Diets

If you have dietary restrictions, you’ll be glad to know that anise cookies can easily be adapted. Here are some special diet-friendly versions:

Keto-Friendly Anise Cookies

  • Replace all-purpose flour with almond flour or coconut flour.
  • Use erythritol or monk fruit sweetener instead of sugar.
  • Add butter or coconut oil for a rich texture.

These swaps make the cookies low-carb without sacrificing flavor.

Vegan Anise Cookies

  • Replace eggs with a flaxseed “egg” (1 tablespoon ground flaxseed + 3 tablespoons water).
  • Use vegan butter or coconut oil instead of regular butter.

Low-Sugar Options

  • Use natural sweeteners like honey, maple syrup, or stevia.
  • Reduce the sugar in the recipe by half and add a touch of vanilla extract for extra flavor.

With these options, everyone can enjoy a delicious batch of anise cookies, regardless of their dietary needs.


How to Store and Preserve Anise Cookies

To make sure your anise cookies stay fresh and delicious, proper storage is key. Here are some tips:

1. Storing Baked Cookies

  • Allow cookies to cool completely before storing.
  • Place them in an airtight container with layers of parchment paper in between.
  • Store at room temperature for up to 2 weeks.

2. Freezing the Dough

If you want to plan ahead, anise cookie dough can be frozen for future use:

  • Shape the dough into a log or scoop it into portions.
  • Wrap it tightly in plastic wrap and place it in a freezer-safe bag.
  • Freeze for up to 3 months.

3. Freezing Baked Cookies

Baked cookies can also be frozen:

  • Allow them to cool fully.
  • Place them in a freezer bag, squeezing out excess air.
  • Thaw at room temperature when ready to enjoy.

Proper storage ensures you’ll always have anise cookies on hand for last-minute cravings or guests!


Anise Cookies Around the World

It’s fascinating to see how anise cookies are celebrated across different cultures. Let’s explore a few global variations:

Italian Biscotti di Anice

These crunchy, twice-baked cookies are perfect for dipping into coffee or wine. They’re a staple at Italian cafes and holiday celebrations.

Mexican Polvorones de Anís

In Mexico, polvorones are shortbread-style cookies flavored with anise and cinnamon. They’re buttery, crumbly, and melt in your mouth—perfect for festive occasions.

Middle Eastern Variations

In Middle Eastern cuisine, anise seeds are often added to ka’ak cookies. These lightly sweetened pastries are enjoyed with tea or coffee and symbolize hospitality.

These regional variations show just how versatile anise cookies can be.


Troubleshooting Common Baking Problems

Even seasoned bakers encounter challenges when making anise cookies. Here are solutions to some common issues:

1. Why Are My Cookies Too Hard?

  • Solution: Reduce the baking time and ensure you’re not overworking the dough.

2. Why Are My Cookies Too Soft?

  • Solution: Bake for a few extra minutes and allow cookies to cool completely before storing.

3. My Dough Is Too Sticky

  • Solution: Chill the dough in the refrigerator for 30 minutes to firm it up.

4. My Cookies Spread Too Much

  • Solution: Use cold dough and avoid adding too much butter or liquid to the recipe.

With these quick fixes, your anise cookies will come out perfect every time!


Making Anise Cookies Kid-Friendly

Want to get kids involved in baking anise cookies? Here are some fun ideas:

  • Use cookie cutters to create fun shapes like animals, stars, and hearts.
  • Add colorful icing and sprinkles to decorate the cookies.
  • For younger kids, reduce the strength of the anise flavor by cutting the amount in half.

Baking together can turn into a fun family activity, and kids will love adding their creative touches to these tasty treats.


Adding a Modern Twist to Classic Recipes

While traditional anise cookies are wonderful, it’s always fun to try something new! Here are a couple of modern variations:

  • Citrus Anise Cookies: Add lemon or orange zest to the dough for a bright, refreshing twist.
  • Chocolate-Dipped Anise Cookies: After baking, dip half of each cookie in melted dark chocolate and let it set.

These creative updates make anise cookies perfect for modern tastes while still honoring their timeless flavor.


Hosting a Holiday Baking Party with Anise Cookies

Hosting a baking party is a fun way to share the joy of anise cookies. Here’s how to plan it:

  • Theme: Create a holiday theme like Christmas, Easter, or a cozy winter gathering.
  • Decorating Station: Set up an area with icing, sprinkles, and molds for decorating cookies.
  • Other Treats: Include other traditional desserts like gingerbread or sugar cookies.

A holiday baking party is a wonderful way to create memories, share recipes, and enjoy the magic of anise cookies.

Anise Cookies for Holidays and Celebrations

When it comes to holidays and celebrations, anise cookies hold a special place in many cultures. They are more than just sweet treats; they represent tradition, family, and festivity.

Why They’re a Favorite During Christmas and Easter

To begin with, anise cookies have become a cherished part of Christmas traditions in countries like Italy and Germany. Their warm, aromatic flavor brings comfort during the winter season, making them perfect for gatherings and holiday desserts. Italian families, for example, serve anisette cookies during Christmas feasts, often topped with festive sprinkles.

At the same time, Easter celebrations are another major occasion for these cookies. In many cultures, they symbolize renewal and joy. Families bake large batches of anise cookies to share after Easter church services or as gifts to loved ones. The light, refreshing flavor perfectly complements the bright colors and themes of springtime.

Cultural Significance in Religious Feasts

Moreover, anise-flavored treats often appear in religious feasts and ceremonies. In German traditions, Springerle cookies are intricately molded with religious imagery, symbolizing faith and heritage. Similarly, in Spain, Polvorones de Anís are enjoyed during religious holidays as a way of honoring both culture and tradition.

Ultimately, anise cookies have endured through generations because they bring people together. Whether it’s Christmas, Easter, or a family gathering, these cookies add nostalgia and a sense of joy to any celebration.


Anise and Its Role in Traditional Medicine

Interestingly, anise has been valued not just for its flavor but also for its medicinal properties throughout history. Across different cultures, it has been used as a remedy for common ailments, which adds another layer of significance to anise cookies.

Anise as a Remedy for Digestion and Colds

For instance, ancient Greeks and Romans used anise seeds to improve digestion after heavy meals. Similarly, in traditional Indian medicine, anise is known to calm an upset stomach, reduce bloating, and ease nausea. This explains why anise-flavored desserts, like cookies, are often enjoyed after large feasts.

In addition, anise has natural compounds that help relieve coughs and colds. For centuries, people have brewed anise tea or consumed anise-infused sweets to soothe sore throats. So, next time you enjoy an anise cookie, you’re not only savoring a treat but also experiencing its ancient healing properties.

Ancient Uses in Cooking and Health

Throughout history, anise has been praised in both cooking and health remedies. The Egyptians, for example, used anise seeds in bread and herbal tonics. Meanwhile, the Romans introduced anise-flavored cakes to celebrate special occasions, believing the spice promoted overall wellness.

It’s truly fascinating how one tiny seed has played such a multifaceted role in history, bridging food, culture, and health.


Experimenting with Texture and Shape

When baking anise cookies, there’s no limit to how creative you can get. From different textures to unique shapes, there’s plenty of room for experimentation.

Springerle Molds for Embossed Cookies

If you want your cookies to stand out, try using Springerle molds. These molds press beautiful, intricate patterns into the dough, turning simple cookies into edible works of art. To make embossed cookies:

  1. Roll the dough evenly.
  2. Press the mold firmly to create an impression.
  3. Chill the dough before baking to preserve the details.

The result is a stunning cookie that’s almost too beautiful to eat.

Drop Cookies vs. Rolled-Out Cookies

  • Drop cookies: For a simpler option, scoop spoonfuls of dough onto a baking sheet and bake. These cookies are soft, pillowy, and ideal for casual gatherings.
  • Rolled-out cookies: Roll the dough flat and use cookie cutters to create fun shapes like stars, hearts, or circles.

By experimenting with texture and shape, you can customize anise cookies to suit any occasion or mood.


Comparing Anise Cookies to Other Traditional Cookies

Although anise cookies are unique, they share similarities with other traditional cookies across cultures. Let’s take a look at a few comparisons:

  • Biscotti vs. Springerle: While both are Italian and German classics, biscotti are twice-baked for a crunchy texture, whereas Springerle have a more delicate, embossed appearance.
  • Speculaas: These spiced Dutch cookies have a flavor similar to anise but incorporate cinnamon, nutmeg, and ginger for a more complex profile.

What sets anise cookies apart, however, is their singular licorice flavor. It’s both sweet and aromatic, making them truly special.


Incorporating Anise into Other Desserts

If you love the flavor of anise, why not explore other desserts where it can shine? Here are some creative ideas:

Anise-Infused Cakes and Breads

Add ground anise seeds or anise extract to cakes and quick breads for a subtle yet distinctive flavor. For instance, a lemon-anise loaf cake combines citrus and anise perfectly, offering a modern twist on classic flavors.

Creating Anise-Flavored Frostings and Glazes

  • Mix anise extract into a simple buttercream frosting for cupcakes.
  • Drizzle anise glaze (powdered sugar + anise extract + milk) over cookies, donuts, or scones.

By incorporating anise into other desserts, you’ll discover just how versatile this ingredient can be.


How to Make Anise Cookies in Bulk

Sometimes, you need to bake anise cookies for large gatherings, gifts, or events. Here are a few tips for scaling up your recipe:

  1. Double or Triple the Ingredients: Carefully scale up the recipe, ensuring you measure accurately to maintain consistency.
  2. Work in Batches: Instead of baking everything at once, work in smaller batches to avoid overcrowding the oven.
  3. Freezing for Convenience: As mentioned earlier, freeze dough or baked cookies in advance so you can bake fresh cookies whenever you need them.

Packaging Ideas for Gifting

For a thoughtful gift, package anise cookies in:

  • Decorative tins or mason jars
  • Clear cellophane bags tied with ribbons
  • Festive boxes with handwritten notes

These tips ensure your cookies are not only delicious but also presented beautifully.


Reader Testimonials and Favorite Recipes

It’s always inspiring to hear how others enjoy baking anise cookies. Here are a few heartwarming stories and tips from readers:

  • Maria from New York: “I make my nonna’s recipe every Christmas, and it brings back so many memories of baking with her as a child. I add a touch of orange zest for extra flavor!”
  • Liam from Germany: “I use Springerle molds to create beautiful patterns. It’s a family tradition we cherish every holiday season.”
  • Sofia from Spain: “My family loves Polvorones de Anís. We serve them with coffee after dinner, and they’re always a hit.”

These personal touches prove that anise cookies hold a special place in people’s hearts and kitchens.


Sustainability and Sourcing of Anise

Finally, it’s important to think about where your anise seeds come from. Choosing high-quality, organic anise ensures better flavor and supports sustainable farming practices.

Why Choose Organic Anise?

  • Organic farming avoids harmful pesticides and chemicals.
  • The seeds are fresher, more aromatic, and better for the environment.

Supporting Fair Trade

When buying anise, look for fair trade-certified sources. This helps support small farmers and ensures they’re paid fairly for their work.

By making mindful choices, you can enjoy anise cookies that are both delicious and ethically sourced.


Frequently Asked Questions (FAQs)

  1. Can you use star anise instead of regular anise?
    Yes, but star anise has a stronger, spicier flavor, so use it sparingly.
  2. Why does anise have such a polarizing flavor?
    Anise’s licorice-like taste is unique, which some people love while others find it too strong.
  3. How can I reduce the anise flavor for picky eaters?
    Use half the amount of anise extract or seeds in your recipe.
  4. Are anise cookies gluten-free?
    They can be! Simply replace all-purpose flour with a gluten-free blend.
  5. How long do anise cookies last?
    Stored properly, they last up to 2 weeks at room temperature.
  6. Can I freeze anise cookie dough?
    Absolutely! Wrap it tightly and freeze for up to 3 months.
  7. How do I get perfect shapes with cookie cutters?
    Chill the dough before rolling it out to keep the shapes crisp.
  8. Can I add chocolate to anise cookies?
    Yes, dip them in dark chocolate for a delicious modern twist.
  9. What’s the difference between anise and fennel?
    While similar, anise has a sweeter, more intense flavor than fennel.
  10. Why do Italian families bake anise cookies for holidays?
    It’s a tradition that symbolizes celebration, family, and joy.

Conclusion: The Lasting Appeal of Anise Cookies

In conclusion, anise cookies are a timeless treat that connects generations, cultures, and traditions. From their unique flavor to their versatility, they continue to bring joy to families around the world. Whether you’re baking for a special occasion or simply enjoying a quiet moment with coffee, anise cookies offer something truly special.

So, why not give these cookies a try? Bake a batch, share them with loved ones, and experience the magic of anise cookies.

The Ultimate Guide to Pineapple Casserole

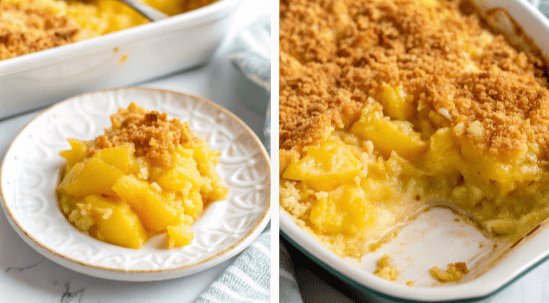
A serving of golden pineapple casserole on a white plate with a baking dish in the background.
A beautifully baked pineapple casserole topped with golden pineapple rings in a white dish.

Introduction: What is Pineapple Casserole?

Pineapple casserole is a unique and delightful dish that combines sweet, tangy, and savory flavors into a comforting casserole that has become a staple in many Southern households. This crowd-pleaser blends the tropical sweetness of pineapple with the sharpness of cheddar cheese and the buttery crunch of crackers.

Its roots trace back to Southern comfort food traditions, where creative cooks would craft recipes that balanced unexpected flavor profiles. The dish emerged as a way to utilize pantry staples like canned pineapple and crackers, and it has since evolved into a must-have on holiday tables and potluck gatherings. Its appeal lies in its perfect combination of textures and tastes, which is both comforting and surprising.

Did you know? Pineapple casserole has become so iconic that it’s now a Southern cultural symbol, appearing alongside dishes like mac and cheese or cornbread stuffing during festive celebrations.


Ingredients Overview: Key Ingredients in Pineapple Casserole

At its heart, pineapple casserole is a simple dish that relies on just a handful of staple ingredients. Here’s what goes into creating this sweet-savory masterpiece:

  • Pineapple: Most recipes call for canned pineapple chunks or tidbits, but fresh pineapple is an excellent alternative for a more vibrant flavor.
  • Cheddar Cheese: The tangy sharpness of cheddar cheese complements the sweetness of the pineapple beautifully. Mild cheddar works too, but sharp cheddar provides a more balanced flavor.
  • Crackers: Buttery crackers like Ritz are the classic choice, offering a rich, crumbly topping. For those looking for a twist, flavored crackers or even panko breadcrumbs can be used.
  • Butter and Sugar: These enhance the caramelized sweetness and richness of the dish, although some modern versions use less sugar for a healthier spin.
  • Optional Additions: Some cooks add cinnamon, chopped pecans, or even shredded coconut for additional layers of flavor.

This straightforward combination of ingredients creates a dish that is both humble and versatile. Each element plays a role in balancing the casserole’s texture and taste.


Regional Variations: How Pineapple Casserole is Adapted Across the U.S.

Although pineapple casserole originated in the South, modern takes and regional adaptations have transformed it into a dish with countless variations:

  1. Southern Classic Roots: The original version typically features the classic trifecta of pineapple, cheese, and crackers. It’s a holiday staple, often served as a side dish alongside glazed ham or roasted turkey.
  2. Midwestern Versions: Midwestern cooks sometimes add crushed pecans or walnuts to the topping for a nutty crunch.
  3. Modern Health-Conscious Variations: Today, people experiment with whole-grain crackers, reduced sugar, and dairy-free cheeses to suit different dietary needs.

Despite these variations, one thing remains consistent: the irresistible blend of sweet and savory that defines pineapple casserole. It’s a dish that evolves but never loses its nostalgic charm.

For a deeper dive into the origins of pineapple casseroles, check out this article on Southern holiday traditions.


One of the primary reasons for the casserole’s popularity is its ability to perfectly balance contrasting flavors. The tropical sweetness of pineapple is tempered by the rich, tangy cheddar cheese, while the buttery cracker topping adds crunch and depth.

Why It Works:

  • Flavor Harmony: The combination of sweet and salty creates a flavor profile that is both comforting and intriguing.
  • Nostalgia: For many, pineapple casserole is associated with fond memories of family gatherings, festive meals, and potlucks.
  • Versatility: It’s equally at home as a side dish, a dessert, or even a brunch item.

Sweet and savory dishes have a long history of captivating palates—think of pineapple on pizza or chocolate-covered pretzels. Pineapple casserole taps into that universal love for flavor contrasts, making it a standout comfort food.


Nutritional Information: Is Pineapple Casserole Healthy?

While undeniably delicious, pineapple casserole isn’t always the healthiest option. A traditional recipe is rich in calories due to its generous use of cheese, butter, and sugar. Here’s a quick breakdown of the classic version:

  • Calories: 300–400 per serving
  • Fat: High due to cheese and butter
  • Sugar: Moderate to high from pineapple and added sugar

Healthier Substitutions:

For those watching their intake, there are simple ways to lighten up the dish:

  • Swap out buttery crackers for whole-grain or gluten-free options.
  • Use light or dairy-free cheese.
  • Reduce the sugar, letting the pineapple’s natural sweetness shine.

In moderation, pineapple casserole can be part of a balanced meal—especially when paired with lighter mains like roasted chicken or grilled fish.


Tools and Equipment Needed: Essential Kitchen Tools for Making Pineapple Casserole

You don’t need a fancy kitchen setup to make pineapple casserole. These basic tools will ensure your dish turns out perfectly:

  • Baking Dish: A 9×13-inch casserole dish is ideal, but smaller dishes can work for more compact servings.
  • Mixing Bowls: For combining the pineapple filling and preparing the topping.
  • Spatula or Spoon: To layer the ingredients evenly.
  • Knife: For slicing fresh pineapple, if you choose to go that route.

Investing in quality bakeware, such as ceramic or glass dishes, can enhance even cooking and presentation.


Tips for Choosing Ingredients: Picking the Best Pineapple

The quality of your ingredients can make or break your casserole. Here are some tips to ensure you pick the best:

Fresh vs. Canned Pineapple

  • Canned Pineapple: Convenient and consistent. Look for options packed in juice rather than syrup to reduce added sugar.
  • Fresh Pineapple: Offers more vibrant flavor and texture but requires peeling and coring.

Cheese Selection

  • Sharp Cheddar: Brings a bold, tangy flavor to the dish.
  • Mild Cheddar: A softer, more subtle option for those who prefer less contrast.

Choosing Crackers

Buttery crackers like Ritz are the classic choice, but you can experiment with flavored options or even gluten-free varieties for a healthier twist.


Preparing Your Kitchen: Pre-Baking Essentials

Before you begin assembling your casserole, take the time to prep your kitchen. Proper preparation ensures a smoother cooking experience and better results:

  • Prepping the Baking Dish: Grease your casserole dish with butter or cooking spray to prevent sticking.
  • Room Temperature Ingredients: Let your butter and cheese come to room temperature for easier mixing and better incorporation.
  • Draining Pineapple: Whether using fresh or canned, make sure to remove excess liquid to avoid a watery casserole.

A Glimpse into Pineapple Casserole Culture: When to Serve Pineapple Casserole

Pineapple casserole has a reputation as a holiday favorite, particularly in the South. It often makes an appearance on Thanksgiving, Christmas, and Easter tables, but its versatility means it’s also a hit at:

  • Potlucks: A surprising addition to buffet tables.
  • Brunches: Served alongside egg-based dishes or ham.
  • Family Dinners: A comforting side dish that pairs with a variety of mains.

Its nostalgic, quirky appeal ensures that it remains a conversation starter wherever it’s served.


Common Myths and Misconceptions: Debunking Pineapple Casserole Myths

Despite its popularity, pineapple casserole faces its fair share of skepticism. Let’s clear up a few common myths:

  1. “It’s too sweet to be a casserole”: The balance of cheese and crackers tempers the sweetness, ensuring the dish isn’t cloying.
  2. “Cheese and pineapple don’t mix”: On the contrary, their contrasting flavors create a uniquely harmonious taste that has won over countless fans.

This casserole proves that unexpected combinations can often yield the most delightful results.

A baked pineapple casserole with golden brown topping in a white baking dish.

Step-by-Step Recipe: How to Make Classic Pineapple Casserole

Creating a classic pineapple casserole is simple and straightforward, but attention to detail ensures perfect results. Below is a foolproof recipe that yields a rich, golden dish with a perfect balance of flavors.

Ingredients:

  • 2 (20-ounce) cans of pineapple chunks or tidbits, drained
  • 1 cup of sugar (adjust to taste or substitute with a low-calorie sweetener)
  • 1 cup of sharp cheddar cheese, shredded
  • 6 tablespoons of all-purpose flour
  • 1 sleeve of buttery crackers (about 1½ cups, crushed)
  • 1 stick of unsalted butter, melted

Preparation Steps:

  1. Preheat the Oven: Set your oven to 350°F (175°C).
  2. Combine Pineapple and Sugar: In a mixing bowl, toss the drained pineapple with sugar and flour until evenly coated.
  3. Mix in the Cheese: Gently fold in the shredded cheddar cheese to the pineapple mixture.
  4. Prepare the Topping: In a separate bowl, mix crushed crackers with melted butter to create a crumbly topping.
  5. Assemble the Casserole: Spread the pineapple mixture evenly into a greased 9×13-inch baking dish. Sprinkle the cracker topping evenly over the top.
  6. Bake: Place the casserole in the preheated oven and bake for 25–30 minutes, or until the top is golden brown and bubbling.
  7. Cool Slightly and Serve: Let the casserole rest for 5–10 minutes before serving. Enjoy as a side dish or dessert!

Preparing the Pineapple Base: How to Handle Pineapple for the Casserole

The pineapple is the star of the dish, so handling it correctly is crucial for achieving the best flavor and texture.

Draining Canned Pineapple:

  • Pour the pineapple chunks into a colander and let them drain for 10–15 minutes.
  • Press lightly with a spoon to remove any excess juice. Too much liquid can lead to a soggy casserole.

Using Fresh Pineapple:

  • Cutting: Slice off the top and bottom of the pineapple. Stand it upright and cut away the skin in strips. Remove the eyes, then slice the fruit into chunks or tidbits.
  • Measuring: Use about 3 cups of fresh pineapple chunks for this recipe, ensuring a vibrant, tropical flavor.

Making the Topping: The Perfect Crunchy Topping

The topping is what transforms pineapple casserole into a textural masterpiece. A combination of buttery crackers and melted butter creates a golden crust that contrasts beautifully with the soft, tangy pineapple filling.

Basic Topping:

  • 1 sleeve of Ritz crackers (crushed)
  • 1 stick of melted butter

Combine these ingredients and sprinkle evenly over the pineapple mixture before baking.

Topping Variations:

  1. Add Nuts: Toss in crushed pecans or walnuts for a nutty, crunchy texture.
  2. Sweetened Option: Mix in 2 tablespoons of brown sugar with the crackers for a caramelized finish.
  3. Healthier Option: Use whole-grain crackers or gluten-free alternatives to suit dietary needs.

Pro Tip: Toast the cracker topping lightly before adding it to the casserole for an extra layer of flavor.


Assembling the Casserole: Layering for Perfect Results

Layering is key to ensuring that the casserole bakes evenly and every bite has a perfect balance of flavors and textures.

Tips for Assembly:

  1. Even Distribution: Spread the pineapple mixture evenly across the dish to ensure uniform baking.
  2. Topping Placement: Avoid clumping the cracker topping; spread it in a thin, even layer for maximum crunch.
  3. Avoiding Sogginess: Ensure the pineapple is well-drained and don’t skimp on the flour in the filling—it helps thicken the base.

Baking Instructions: Getting the Timing and Temperature Right

Proper baking ensures your casserole turns out golden, bubbly, and irresistible.

Temperature and Timing:

  • Bake at 350°F (175°C) for 25–30 minutes.
  • Look for a golden-brown crust and bubbling edges as signs that your casserole is ready.

Oven Variations:

  • Conventional Ovens: Stick to the 350°F recommendation, but check at the 25-minute mark.
  • Convection Ovens: Reduce the temperature to 325°F and shorten the bake time slightly to prevent over-browning.

Pro Tip: If the topping starts to brown too quickly, cover the dish loosely with aluminum foil for the remaining bake time.


Troubleshooting Common Issues

Even with a straightforward recipe, a few hiccups can occur. Here are tips for fixing common pineapple casserole problems:

  1. Watery Casserole:
    • Ensure the pineapple is thoroughly drained before mixing.
    • Add an extra tablespoon of flour if the mixture seems too liquidy.
  2. Topping Sinks:
    • Use a dry topping mixture; avoid adding too much butter.
    • Sprinkle the topping gently over the pineapple layer.
  3. Too Sweet:
    • Reduce the sugar or use pineapple packed in juice rather than syrup.

Variations on the Recipe: Creative Spins on Pineapple Casserole

Pineapple casserole is incredibly versatile. Experiment with these ideas to make the dish your own:

  1. Tropical Twist: Add shredded coconut or a hint of lime zest to enhance the tropical flavors.
  2. Savory Upgrade: Replace half the cheese with mozzarella and add a sprinkle of fresh thyme for an herby kick.
  3. Dessert Version: Increase the sugar and top with crushed graham crackers for a dessert-like dish.

Fun Idea: Try mini pineapple casseroles baked in individual ramekins for personalized servings at dinner parties.


Making a Healthier Version: Low-Calorie Pineapple Casserole Alternatives

If you’re looking to indulge without the guilt, here are healthier swaps for a lighter pineapple casserole:

  1. Crackers:
    • Replace buttery crackers with whole-grain or gluten-free options.
    • Use almond flour-based crackers for a keto-friendly version.
  2. Cheese:
    • Opt for reduced-fat or plant-based cheese alternatives.
    • Add a touch of nutritional yeast for extra cheesy flavor with fewer calories.
  3. Sugar:
    • Use a natural sweetener like honey, maple syrup, or a sugar substitute like stevia.
    • Rely on the natural sweetness of fresh pineapple to reduce the need for added sugar.

Pairing Suggestions: Perfect Pairings for Pineapple Casserole

Pineapple casserole shines as a side dish, but it pairs wonderfully with other dishes to create a cohesive meal.

Traditional Pairings:

  • Glazed Ham: The salty-sweet flavors of ham complement the tangy pineapple perfectly.
  • Roast Chicken: A comforting, homestyle pairing that works for both weeknight dinners and special occasions.

Modern Pairings:

  • Quinoa Salad: Serve the casserole alongside a light, citrusy salad for a balanced meal.
  • BBQ Ribs: The smoky flavors of barbecue are elevated by the sweetness of the casserole.

Storage and Reheating Tips: Keeping Your Casserole Fresh

Pineapple casserole is an excellent make-ahead dish, but proper storage is essential for maintaining its flavor and texture.

Refrigeration:

  • Store leftovers in an airtight container and refrigerate for up to 3 days.
  • Let the casserole cool completely before storing to prevent condensation.

Freezing:

  • Assemble the casserole but leave off the topping. Cover tightly with plastic wrap and aluminum foil, and freeze for up to 2 months.
  • Add the topping and bake directly from frozen, increasing the bake time by 10–15 minutes.

Reheating:

Warm in a 350°F oven until heated through. Cover with foil to prevent the topping from over-browning.

Advanced Cooking Techniques: Elevating Pineapple Casserole

If you’re ready to take your pineapple casserole skills to the next level, consider these advanced techniques. These tips and tricks will not only refine the dish but also make it a true standout on your table.

Incorporating Fresh Herbs

  • Add a sprinkle of fresh thyme or rosemary to the pineapple mixture for a savory, herbal contrast. These herbs balance the sweetness while adding an aromatic complexity.
  • For a hint of spice, try incorporating a dash of crushed red pepper flakes into the topping for a sweet-heat combination.

Toasting the Topping

  • Before baking the casserole, lightly toast the cracker topping in a skillet with butter. This technique enhances the buttery flavor and ensures an extra-crispy crust.

Experimenting with Layers

  • For a more layered texture, try alternating thin layers of pineapple, cheese, and topping. This method creates a lasagna-like effect, with every forkful delivering distinct layers of flavor and texture.

Pro Tip: Use freshly grated cheddar cheese instead of pre-shredded varieties. Pre-shredded cheese often contains anti-caking agents that can prevent smooth melting.


Pineapple Casserole for Special Diets: Gluten-Free and Dairy-Free Options

Whether you’re cooking for dietary restrictions or just exploring healthier alternatives, pineapple casserole can be easily adapted to suit various needs.

Gluten-Free Alternatives

  • Replace the traditional crackers with gluten-free crackers or crushed rice cakes.
  • Use almond flour or gluten-free breadcrumbs to achieve a similar crunch for the topping.

Dairy-Free and Vegan Substitutions

  • Swap out cheddar cheese with a plant-based, dairy-free cheese alternative. Brands like Daiya or Violife offer great options.
  • Replace butter with vegan butter or coconut oil for a dairy-free topping.
  • Use nutritional yeast as a cheesy, nutty-tasting alternative that’s both vegan and low-calorie.

Fun Fact: Combining coconut milk with pineapple creates a subtle piña colada twist—perfect for a tropical variation!


Fun Facts About Pineapple Casserole: Interesting Tidbits About This Unique Dish

Pineapple casserole may seem quirky at first glance, but it carries a fascinating history and cultural significance. Here are some fun facts that might surprise you:

  1. Southern Origins: Pineapple casserole is a direct descendant of the Southern tradition of combining sweet and savory flavors, a hallmark of dishes like honey-glazed ham and cornbread stuffing.
  2. Pineapple’s Symbolism: Pineapples were once considered a symbol of hospitality and wealth in the Southern U.S. Incorporating pineapple into dishes like casseroles reflected the host’s generosity.
  3. Holiday Staple: While it’s now enjoyed year-round, pineapple casserole has become synonymous with festive meals like Easter and Christmas, particularly in the South.

Did you know? Pineapple casserole recipes began appearing in community cookbooks during the 1950s, showcasing its deep roots in shared family traditions.


Serving Ideas and Presentation: Making Pineapple Casserole Look Appealing

Although pineapple casserole is a comfort food classic, a little extra attention to presentation can elevate its appeal—especially for potlucks or dinner parties.

Plating Techniques:

  • Use a ceramic baking dish with decorative edges to serve directly from the oven to the table. The rustic look complements the dish’s homestyle charm.
  • For individual portions, bake the casserole in ramekins or small cast-iron skillets. These mini servings are visually stunning and prevent portioning messes.

Garnishing:

  • Sprinkle fresh herbs like parsley or thyme over the baked casserole for a pop of color.
  • For a dessert-style casserole, dust the top with powdered sugar or drizzle a bit of caramel sauce.

Pineapple casserole’s versatility makes it a fantastic side dish or a standalone offering. Pair it with complementary dishes for a well-rounded meal:

Traditional Southern Pairings

  1. Glazed Ham: A classic match, the salty-sweet ham enhances the casserole’s tropical sweetness.
  2. Fried Chicken: Serve it alongside crispy fried chicken for a hearty Southern feast.
  3. Green Bean Casserole: This pairing creates a comforting spread for Thanksgiving or Christmas.

Modern Pairings

  1. Grilled Salmon: The tangy-sweet pineapple flavor complements the richness of salmon.
  2. Sweet Potato Fries: These create a delicious side-by-side balance of sweet flavors with contrasting textures.
  3. Quinoa Salad with Citrus Dressing: A light, healthy pairing to balance the casserole’s richness.

Pro Tip: Pair pineapple casserole with sparkling wine or citrusy cocktails to enhance its tropical essence.


Community Feedback: What People Love About Pineapple Casserole

Pineapple casserole has a dedicated fan base of cooks and food enthusiasts who rave about its flavor and versatility. Here’s what people love most about this dish:

  1. Nostalgia: Many recall growing up with pineapple casserole at family gatherings, making it a dish tied to warm memories.
  2. Flavor Contrast: Fans adore the way the tangy pineapple and sharp cheddar complement each other in unexpected harmony.
  3. Ease of Preparation: Home cooks often highlight how simple the recipe is while delivering crowd-pleasing results.

Real-Life Anecdote: A home cook from Georgia shared, “The first time I made this, I was skeptical about pineapple and cheese. But the dish was empty in 15 minutes at our church potluck!”


Hosting with Pineapple Casserole: Making It the Star of the Table

If you’re hosting a dinner party, pineapple casserole can become the centerpiece of your menu with a few creative touches.

Themed Dinners:

  • Southern Comfort Feast: Pair the casserole with fried catfish, cornbread, and collard greens for an authentic Southern spread.
  • Tropical Getaway: Incorporate coconut rice, grilled shrimp skewers, and a pineapple salsa to create a summery, tropical-themed dinner.

Table Setting Ideas:

  • Use vibrant linens and tropical decorations like palm leaves or pineapples for a cohesive theme.
  • Serve drinks in mason jars or tiki glasses for added flair.

Hosting Tip: Make pineapple casserole ahead of time and focus on other dishes during the event. The casserole reheats beautifully without losing its charm.


Pineapple Casserole Around the World: How Other Cultures Adapt Similar Flavors

While pineapple casserole is distinctively Southern, the idea of pairing pineapple with savory ingredients is embraced globally. Here’s a look at how other cuisines explore similar flavor profiles:

  1. Hawaiian Cuisine: Pineapple is frequently paired with ham or spam in Hawaiian pizza or musubi dishes.
  2. Caribbean Cooking: In the Caribbean, pineapple is often grilled and served alongside jerk chicken, highlighting its sweet-savory versatility.
  3. Filipino Dishes: In the Philippines, pineapple is a key ingredient in pork adobo and other savory stews, adding sweetness to balance salty and sour flavors.

Frequently Asked Questions

Here are 10 common questions about pineapple casserole, answered for your convenience:

1. Can I make pineapple casserole ahead of time?

Yes! Assemble the casserole without the topping, refrigerate it overnight, and add the topping just before baking.

2. What’s the best cheese to use?

Sharp cheddar is the classic choice, but you can experiment with gouda, mozzarella, or even a blend of cheeses.

3. Can I freeze pineapple casserole?

Absolutely! Freeze the unbaked casserole without the topping. Add the topping and bake directly from frozen, increasing the cook time.

4. Can I use fresh pineapple instead of canned?

Yes! Fresh pineapple adds a more vibrant flavor. Just ensure it’s properly peeled, cored, and chopped.

5. Is pineapple casserole a dessert or a side dish?

It’s traditionally a side dish, but with slight tweaks (like extra sugar), it can double as a dessert.

6. Can I reduce the sugar in the recipe?

Of course! Pineapple is naturally sweet, so reducing sugar or using a sugar substitute works well.

7. What’s the best way to reheat leftovers?

Reheat in a 350°F oven, covered with foil, until warmed through. Avoid microwaving to preserve the texture of the topping.

8. Can I make it gluten-free?

Yes! Use gluten-free crackers or breadcrumbs for the topping and ensure any other ingredients are certified gluten-free.

9. What’s the most popular occasion for serving pineapple casserole?

It’s a favorite during holidays like Easter, Thanksgiving, and Christmas but is also a hit at potlucks and BBQs.

10. Can I add other fruits?

Certainly! Add diced peaches or mango for a fun tropical variation.


Conclusion: Why Pineapple Casserole Is Worth Trying

Pineapple casserole is more than just a dish—it’s a celebration of contrasts, a symbol of Southern hospitality, and a timeless recipe that continues to surprise and delight. Whether you’re serving it at a holiday gathering or simply experimenting in the kitchen, this dish offers something for everyone. Don’t be afraid to make it your own, and share the joy of pineapple casserole with friends and family!

Mini Pancakes: The Ultimate Guide to Recipes, Toppings, and Trends

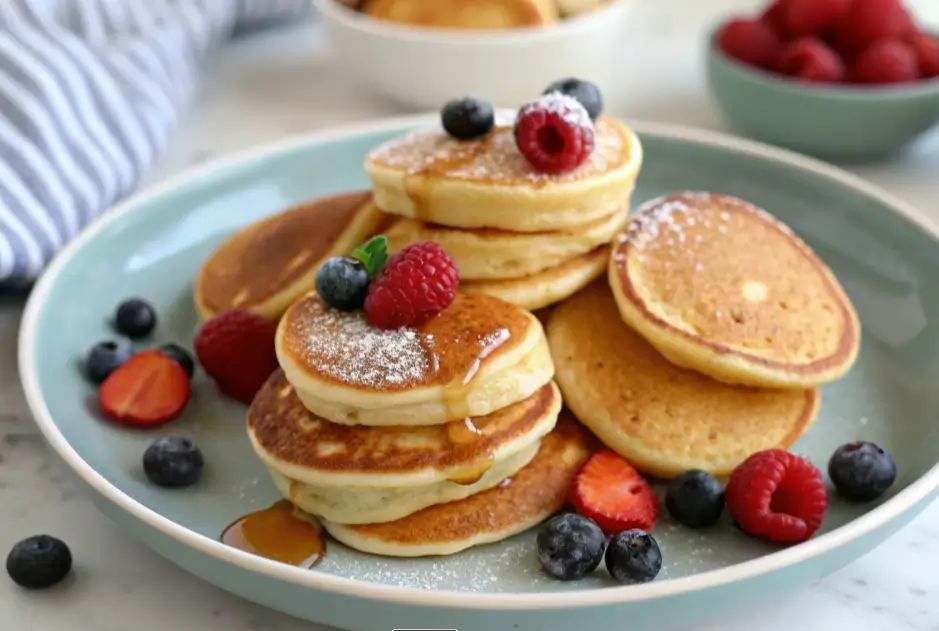
Stack of golden mini pancakes garnished with fresh blueberries, raspberries, strawberries, and a drizzle of maple syrup.
Mini pancakes stacked on a plate, topped with fresh raspberries.

What Are Mini Pancakes?

Mini pancakes are a delightful twist on the classic breakfast staple. As the name suggests, these pancakes are smaller in size, typically bite-sized, making them an adorable and versatile treat. Unlike regular pancakes, which are often served in large, stacked portions, mini pancakes are designed to be eaten in just a few bites.

These tiny pancakes can be served as a snack, breakfast, or dessert, and they are popular for their cute, Instagram-worthy appearance. Whether stacked, skewered, or served in bowls as “pancake cereal,” mini pancakes are a crowd-pleaser for all ages.


History and Origin of Mini Pancakes

Pancakes have a long, rich history that dates back thousands of years. Evidence of pancake-like dishes exists in ancient Greece and Rome. However, mini pancakes as a concept likely stem from specific regional culinary traditions.

  • In the Netherlands, for instance, Poffertjes—a type of small, fluffy pancake—have been a staple since the 18th century. Traditionally made with buckwheat flour, these pancakes are cooked in a special pan with shallow indentations to maintain their perfect round shape.
  • Japanese Dorayaki is another variation, where two mini pancakes sandwich a sweet red bean filling.

Over time, modern adaptations in America and other countries have transformed mini pancakes into a trendy snack and breakfast option. Their convenient size and ability to pair with various toppings make them appealing worldwide.


The growing popularity of mini pancakes can be attributed to several factors:

  1. Aesthetic Appeal: Their small size is visually charming and perfect for social media.
  2. Versatility: Mini pancakes can be adapted for any meal, from breakfast to dessert.
  3. Portion Control: They offer a manageable way to indulge without overloading.
  4. Kid-Friendly: Their fun size makes them a hit with kids.

Additionally, the rise of viral trends on platforms like TikTok and Instagram, such as mini pancake cereal, has solidified their status as a must-try dish for food enthusiasts.


Mini Pancakes vs. Regular Pancakes

How do mini pancakes differ from their regular counterparts? Let’s break it down:

  • Size: Mini pancakes are much smaller, typically 2-3 inches in diameter.
  • Cooking Technique: Mini ps cooks faster and requires smaller portions of batter.
  • Presentation: Regular pancakes are often stacked, while mini pancakes are served in creative ways—skewers, cereal bowls, or even decorative platters.

Although their flavor remains similar, mini pancakes have an added edge due to their adaptability and visual appeal.


Nutritional Benefits of Mini Pancakes

While pancakes, in general, may not be considered a “health food,” mini pancakes offer nutritional flexibility depending on the ingredients used.

  • Whole Grains: Using whole wheat flour can boost fiber content.
  • Customizable Add-Ins: Add fruits like bananas or blueberries to enhance vitamins and antioxidants.
  • Portion Control: Smaller pancakes help manage calorie intake.

Opt for healthier toppings like fresh fruits, yogurt, or a drizzle of honey instead of heavy syrups for a guilt-free treat.


Common Uses for Mini Pancakes

Mini pancakes are not just limited to breakfast; in fact, their versatility allows them to shine in a wide variety of settings. Whether you’re planning a hearty morning meal, a quick snack, or even a decadent dessert, mini pancakes fit seamlessly into every scenario.

For Breakfast: To begin with, pair mini pancakes with eggs and crispy bacon for a hearty start to your day. Furthermore, their small size makes them a great addition to any breakfast platter without feeling overwhelming.

As Snacks: When hunger strikes in the middle of the day, mini pancakes are perfect for dipping into Nutella or peanut butter. Additionally, they are bite-sized, portable, and easy to eat, making them ideal for busy mornings or an afternoon pick-me-up.

For Desserts: Mini pancakes also excel in dessert creations. For example, you can stack them with whipped cream, fresh berries, or even chocolate ganache to create a show-stopping mini pancake cake. Moreover, these tiny treats are highly customizable, allowing you to cater to individual tastes.

Because of their ability to cater to both sweet and savory palates, mini pancakes have become a favorite across all mealtimes. Ultimately, their charm lies in their adaptability and universal appeal.


Ingredients Needed for Mini Pancakes

Creating mini pancakes doesn’t require any fancy ingredients, which is why they’re so easy to whip up at home. Here’s a basic list of what you’ll need:

  • All-purpose flour: Or, for a healthier twist, substitute with whole wheat flour.
  • Milk: Dairy milk works well, but plant-based alternatives like almond or oat milk are equally effective.
  • Eggs: Essential for binding the batter together.
  • Sugar: Just a small amount adds the right touch of sweetness.
  • Baking powder: This ensures your mini pancakes rise and turn out fluffy.
  • A pinch of salt: Enhances the flavor of the pancakes.
  • Butter or oil: For greasing the pan and adding richness to the batter.

For added flavor, you can include extras like vanilla extract, cinnamon, or even a pinch of nutmeg. Most importantly, these simple ingredients are likely already in your pantry, making mini pancakes an accessible dish to prepare at any time.


Essential Tools for Making Mini Pancakes

To achieve perfect mini pancakes, certain tools are absolutely essential. First and foremost, you’ll need a non-stick skillet or griddle, as it ensures even cooking without the risk of sticking. A non-stick surface is particularly important given the small size of the pancakes, which can be tricky to flip.

Next, having measuring spoons is crucial for precise portions, as consistency is key when making mini pancakes. Additionally, investing in a mini pancake pan can make a significant difference, as its shallow molds are specifically designed to create perfectly round shapes.

To ensure uniform batter placement, consider using a piping bag or squeeze bottle. These tools make it easy to control the amount of batter you pour, which helps achieve evenly sized pancakes every time.

By keeping these tools on hand, you’ll guarantee a hassle-free cooking experience while ensuring your mini pancakes are both delicious and visually appealing.


How Mini Pancakes Became a Social Media Trend

The rise of mini pancakes to global fame owes much to social media platforms like TikTok and Instagram. These platforms played a pivotal role in transforming the humble mini pancake into a viral sensation. For instance, the trend of mini pancake cereal, where tiny pancakes are served in bowls and eaten like cereal with milk, captured the attention of millions of users.

What made this trend so successful was not just its creativity but also its aesthetic appeal. Mini pancakes are incredibly photogenic, and their bite-sized nature makes them perfect for showcasing on video. Additionally, food bloggers and influencers embraced the trend, experimenting with unique flavors, colorful toppings, and innovative serving styles.

This viral phenomenon highlights how food presentation can elevate even the simplest dishes into something engaging and trendy. As a result, mini pancakes remain in the spotlight, continuing to inspire home cooks and professionals alike to put their creative spins on this versatile treat.


Variations of Mini Pancakes Around the World

Mini pancakes have unique interpretations in various cuisines:

  • Poffertjes (Netherlands): Fluffy, round pancakes often served with powdered sugar and butter.
  • Dorayaki (Japan): Sweet small pancakes filled with red bean paste.
  • Russian Blini: While not technically pancakes, these small, round treats are used for savory toppings like caviar or smoked salmon.
  • Appam (India): Fermented rice batter pancakes, smaller in size, served with coconut-based curries.

Each variation highlights the global appeal of small pancakes and their cultural significance.


Conclusion

Mini pancakes are more than just a food trend—they’re a fun, versatile, and universally loved dish with a rich history. Their global variations, social media popularity, and adaptability to various diets make them a staple worth trying.

Plate of mini pancakes layered with raspberries and blueberries, lightly dusted with powdered sugar and topped with syrup.

Step-by-Step Guide to Making Mini Pancakes

Basic Recipe for Classic Mini P

Making classic small pancakes is simple and requires just a few ingredients. Here’s a quick recipe to get you started:

Ingredients:

  • 1 cup all-purpose flour
  • 1 tablespoon sugar
  • 1 teaspoon baking powder
  • ½ teaspoon baking soda
  • ¼ teaspoon salt
  • ¾ cup milk (any type)
  • 1 egg
  • 2 tablespoons melted butter (plus extra for greasing)
  • 1 teaspoon vanilla extract (optional)

Instructions:

  1. In a mixing bowl, whisk together the dry ingredients: flour, sugar, baking powder, baking soda, and salt.
  2. In another bowl, combine milk, egg, melted butter, and vanilla. Gradually add this wet mixture to the dry ingredients, whisking until smooth. Avoid overmixing.
  3. Preheat a non-stick skillet or griddle over medium heat and lightly grease with butter.
  4. Use a teaspoon or squeeze bottle to pour small, uniform circles of batter onto the skillet.
  5. Cook for 1-2 minutes or until bubbles appear on the surface. Flip and cook the other side for another minute.
  6. Serve warm with your favorite toppings!

Tips for Getting the Perfect Size

The charm of mini P lies in their uniformity. Follow these tips to master their size:

  • Use a squeeze bottle: This ensures precise control over the batter, creating evenly-sized pancakes.
  • Keep them small: Aim for a diameter of 1.5-2 inches. Anything larger may lose the “mini” appeal.
  • Cook in batches: Avoid overcrowding the pan to make flipping easier.

With practice, you’ll achieve perfectly round and evenly cooked mini pancakes every time.


Common Mistakes and How to Avoid Them

Making mini pancakes can be tricky without a few helpful pointers. Here are the common pitfalls and solutions:

  • Overmixing the batter: This can make pancakes dense and chewy. Mix just until the ingredients are combined.
  • Cooking on high heat: Too hot, and the pancakes will burn on the outside while remaining undercooked inside. Stick to medium heat.
  • Flipping too soon: Wait for bubbles to appear on the surface before flipping to ensure a fully cooked interior.

By avoiding these mistakes, you’ll consistently create fluffy and delicious small pancakes.


Vegan Mini Pancakes Recipe

Want to make a plant-based version? Substitute a few ingredients to enjoy vegan mini pancakes.

Ingredients:

  • 1 cup all-purpose flour
  • 1 tablespoon sugar
  • 1 teaspoon baking powder
  • ¼ teaspoon salt
  • ¾ cup almond or oat milk
  • 2 tablespoons vegetable oil or melted coconut oil
  • 1 teaspoon apple cider vinegar (acts as a leavening agent)

Instructions:

  1. Mix the dry ingredients in one bowl and the wet ingredients in another. Combine and stir until smooth.
  2. Cook on a greased skillet just as you would regular pancakes.

These pancakes are just as fluffy and delicious as their traditional counterparts!


Gluten-Free Mini Pancakes Recipe

For those with gluten sensitivities, here’s a gluten-free mini pancake recipe:

Ingredients:

  • 1 cup gluten-free flour blend
  • 1 tablespoon sugar
  • 1 teaspoon baking powder
  • ½ teaspoon xanthan gum (for binding)
  • ¾ cup milk (or a non-dairy alternative)
  • 1 egg
  • 2 tablespoons butter

Follow the same steps as the classic recipe. These pancakes have a soft texture and a great taste!


Making Fluffy Mini Pancakes

Achieving fluffy small pancakes requires attention to technique:

  • Don’t overmix the batter: A slightly lumpy batter traps air, which creates a fluffy texture.
  • Use fresh baking powder: Expired baking powder won’t give the lift you need.
  • Let the batter rest: Allow the batter to sit for 5-10 minutes before cooking.

A well-rested batter ensures maximum fluffiness!


Using Mini Pancake Makers vs. Manual Methods

A mini pancake maker can significantly simplify the process of making mini pancakes. However, is investing in one truly worth it? Let’s weigh the pros and cons.

Pros:

  • First of all, mini pancake makers ensure uniform shapes, making your pancakes visually appealing and consistent in size.
  • Secondly, they help speed up cooking time by allowing you to prepare multiple pancakes simultaneously.
  • Finally, most pancake makers come with non-stick surfaces, which make flipping pancakes a breeze and cleanup effortless.

Cons:

  • On the other hand, the batch size is often limited, meaning you may need to cook multiple rounds if feeding a large group.
  • Moreover, adding another gadget to your kitchen could contribute to clutter, especially if you don’t use it frequently.

If you prefer manual methods, don’t worry—you can still achieve excellent results. For instance, using a piping bag or squeeze bottle allows you to control the batter’s placement and mimic the precision of a pancake maker. Both approaches yield delicious, perfectly sized pancakes, so it ultimately depends on your preference and kitchen setup.


Creative Flavors for Mini Pancakes

Why stick to plain pancakes when you can elevate your mini pancakes with creative flavor additions? These small tweaks can completely transform the dish and cater to different tastes:

  1. Chocolate: Add cocoa powder to the batter or sprinkle in some chocolate chips for a rich, dessert-like treat. Chocolate pancakes are perfect for satisfying your sweet tooth, especially when paired with whipped cream or a drizzle of syrup.
  2. Banana: For natural sweetness, mash a ripe banana and mix it into the batter. Not only does this add a delicious flavor, but it also boosts the nutritional value of your pancakes.
  3. Cinnamon: Stir in a teaspoon of cinnamon to infuse warmth and spice into your pancakes. This works especially well when paired with toppings like maple syrup or caramelized apples.

Experimenting with different combinations of these flavors allows you to find your personal favorite. For example, try mixing banana and chocolate for a decadent twist, or pair cinnamon with nutmeg for a cozy, autumn-inspired flavor.


How to Keep Mini Pancakes Warm and Fresh

If you’re preparing mini pancakes for a group, keeping them warm and fresh is absolutely essential to ensure everyone enjoys them at their best. Here are a few tried-and-true methods to maintain their texture and flavor:

  1. Use an Oven: Preheat your oven to 200°F and place cooked pancakes on a baking tray lined with parchment paper. This gentle heat keeps them warm without overcooking or drying them out.
  2. Avoid Stacking: To prevent sogginess, avoid stacking your pancakes directly on top of one another. Instead, separate each layer with parchment paper or a clean kitchen towel.
  3. Serve Immediately: Mini pancakes taste best when served fresh off the skillet, so try to time your cooking process to match when they’ll be eaten.

Proper storage is also key to maintaining their quality. For example, you can refrigerate leftovers in an airtight container and reheat them in the oven or on a skillet for a freshly made taste. By following these steps, you’ll ensure your mini pancakes remain fluffy, warm, and delicious for everyone to enjoy!


Storage and Reheating Tips for Mini Pancakes

If you have leftovers, store them correctly to maintain quality:

  • Refrigeration: Store in an airtight container for up to 3 days.
  • Freezing: Place pancakes in a single layer on a baking sheet. Once frozen, transfer them to a freezer bag for up to 2 months.

Reheating Tips:

  • Microwave: Heat for 15-20 seconds.
  • Oven: Warm at 300°F for 5-7 minutes.
  • Skillet: Reheat over low heat for a fresh-off-the-pan taste.

With these tips, you’ll never have to waste a single mini pancake.


Conclusion

Making small pancakes at home is an enjoyable and rewarding process. From classic recipes to vegan and gluten-free options, there’s something for everyone. With the right techniques, tools, and creative flavoring ideas, you can whip up a batch of mini pancakes that delight any crowd.

Serving and Customizing Mini Pancakes

Topping Ideas for Mini Pancakes (Fruits, Syrups, Whipped Cream)

The right toppings can transform your small pancakes into a culinary masterpiece. Here are some popular ideas to inspire your creativity:

  1. Fruits:
    • Fresh berries (strawberries, blueberries, raspberries)
    • Sliced bananas or kiwis
    • A sprinkle of pomegranate seeds for a burst of flavor
  2. Syrups:
    • Classic maple syrup
    • Chocolate or caramel drizzle
    • Fruit compotes like blueberry or peach
  3. Whipped Cream:
    • A dollop of classic whipped cream
    • Coconut whipped cream for a dairy-free option
    • Add a dash of cinnamon or cocoa powder for flair
  4. Nuts and Seeds:
    • Chopped almonds, pecans, or walnuts
    • A sprinkle of chia or flax seeds for added nutrition
  5. Indulgent Options:
    • Nutella or peanut butter spread
    • A scoop of ice cream for a dessert twist
    • Mini marshmallows melted over warm pancakes

Combine these elements to create your personalized mini pancake platter!


Mini Pancake Cereal Trend: What Is It?

The mini pancake cereal trend exploded on social media as a playful way to enjoy pancakes. Instead of traditional-sized pancakes, tiny pancakes (about the size of a quarter) are served in a bowl and eaten like cereal.

How to Make Mini Pancake Cereal:

  • Use a piping bag or squeeze bottle to create dime-sized batter drops.
  • Cook until golden on both sides.
  • Serve in a bowl with milk or top with butter, syrup, and sprinkles for extra fun.

This trend adds an exciting twist to breakfast and appeals especially to kids and social media enthusiasts.


How to Serve Mini Pancakes for Breakfast Buffets

Mini pancakes are perfect for breakfast buffets because they’re versatile and easy to serve. Here’s how to set up an appealing spread:

  • Toppings Bar: Offer a variety of syrups, fruits, whipped creams, and nuts for guests to customize their pancakes.
  • Warm Serving: Use chafing dishes or warming trays to keep pancakes fresh throughout the event.
  • Mini Skewers: Pre-assemble skewers of mini pancakes alternating with fruit pieces for grab-and-go convenience.

Buffets with mini pancakes allow guests to tailor their plates while creating a visually stunning presentation.


Party and Dessert Ideas Featuring Mini Pancakes

Small pancakes can steal the show at any party. Here are some creative ways to incorporate them into your next event:

  1. Mini Pancake Towers: Stack pancake s with layers of cream and fruit for individual servings.
  2. Dessert Platters: Arrange pancakes with chocolate dips, sprinkles, and fresh fruits for an interactive dessert option.
  3. Mini Pancake Sundaes: Serve pancake s in bowls topped with ice cream, syrup, and whipped cream.

These ideas add a unique and interactive element to your party menu!


Mini Pancake Skewers: A Fun Serving Option

Skewers are an innovative way to serve mini P. Simply thread pancakes onto skewers, alternating with:

  • Fresh fruits like strawberries, grapes, or melon cubes
  • Small marshmallows for a sweet touch
  • Rolled-up slices of bacon for a savory combo

These skewers make a delightful addition to breakfast tables, parties, or brunch events.


Mini Pancakes for Kids: Fun Shapes and Colors

Kids adore mini pancakes, and adding a playful twist makes them even more appealing:

  1. Fun Shapes: Use cookie cutters to create mini pancakes in star, heart, or animal shapes.
  2. Colorful Pancakes: Add natural food coloring to the batter for vibrant pancakes in shades of pink, blue, or green.
  3. Decorate Together: Let kids add their own toppings, such as sprinkles, chocolate chips, or candy pieces.

These little changes make mealtime more enjoyable and interactive for children.


Pairing Mini Pancakes with Beverages (Coffee, Smoothies)

small pancakes pair wonderfully with a variety of beverages:

  • Coffee:
    • A latte or cappuccino complements the sweetness of pancakes.
    • For something indulgent, pair with a caramel macchiato.
  • Smoothies:
    • Berry smoothies or green smoothies provide a fresh, healthy pairing.
    • For a treat, try a banana-peanut butter smoothie alongside your pancakes.

Pairing the right drink enhances the overall mini pancake experience.


Mini Pancake Platters for Special Occasions

Creating a mini pancake platter for special occasions like birthdays or brunch gatherings is a guaranteed hit. Include:

  • A variety of pancake flavors (chocolate, cinnamon, banana).
  • Multiple dipping sauces (syrups, melted chocolate, or flavored creams).
  • Decorative elements like edible flowers or colorful sprinkles for a festive touch.

Plating these elements creatively ensures your platter becomes the centerpiece of any table.


Making Savory Mini Pancakes (Cheese, Herb, or Bacon Additions)

Who says pancakes have to be sweet? Savory mini P are a delicious alternative:

  • Cheese Pancakes: Add grated cheddar or Parmesan to the batter.
  • Herb Pancakes: Mix in chopped chives, parsley, or dill for a fresh taste.
  • Bacon Pancakes: Fold in crispy bacon bits for a savory crunch.

Serve savory mini pancakes with sour cream or yogurt dips for a satisfying appetizer or snack.


International Mini Pancake Recipes (Poffertjes, Dorayaki)

Mini pancakes have global interpretations, each with unique flavors:

  1. Poffertjes (Netherlands):
    • Ingredients: Buckwheat flour, yeast, milk, and butter.
    • Typically served with powdered sugar and butter.
  2. Dorayaki (Japan):
    • Two bite-sized pancakes sandwiched in a sweet red bean paste.
    • Often enjoyed as a snack or dessert.
  3. Russian Blini:
    • Made with yeast-raised batter and often served with savory toppings like caviar or smoked salmon.
  4. Scotch Pancakes (UK):
    • Slightly denser, these pancakes are often served with jam or clotted cream.

Trying these international variations adds depth to your mini pancake journey.


Conclusion

Mini pancakes are not just a delightful dish—they’re an experience. From vibrant toppings to fun serving styles like skewers and platters, they can be adapted for every occasion. Whether you’re hosting a party, indulging in a weekend brunch, or experimenting with international recipes, small pancakeare versatile, flavorful, and sure to impress.

This concludes Part 3. Let me know if you’d like further assistance or additional content related to mini pancakes!


FAQs

  1. What makes small pancakes different from regular pancakes?
    Their size, presentation, and faster cooking time set them apart.
  2. Can I make mini pancakes in advance?
    Yes, store them in an airtight container and reheat as needed.
  3. What’s the best topping for small pancakes?
    Fruits, whipped cream, and syrup are classics, but the possibilities are endless.
  4. Can I make small pancakes without eggs?
    Yes, substitute eggs with mashed bananas, applesauce, or flaxseed meal.
  5. Are small pancakes healthy?
    They can be, especially when made with whole-grain flour and healthy toppings.
  6. What tools do I need to make mini pancakes?
    A non-stick skillet, piping bag, and spatula are essential.
  7. Can I freeze small pancakes?
    Absolutely. Freeze in a single layer, then store in a freezer-safe bag.
  8. What’s the origin of poffertjes?
    Poffertjes originated in the Netherlands as a traditional festival food.
  9. How do I make vegan small pancakes?
    Replace eggs with apple cider vinegar and milk with plant-based alternatives.
  10. What’s the secret to fluffy mini pancakes?
    Use fresh leavening agents and let the batter rest before cooking.

How to Make the Perfect Libbys Pumpkin Roll: Step-by-Step Guide

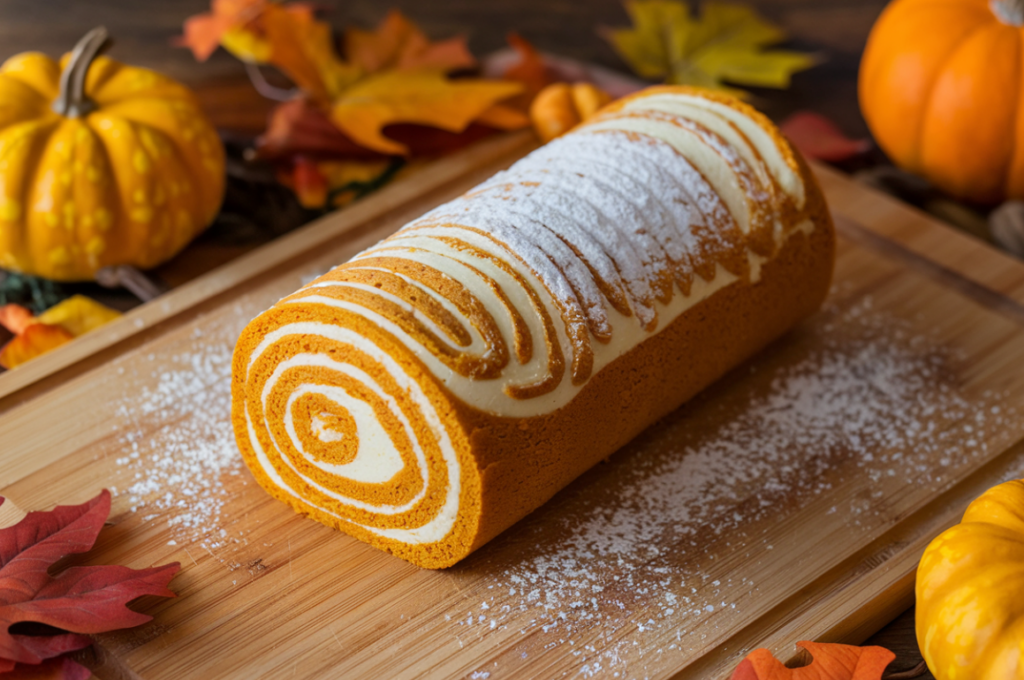
A rolled pumpkin cake with creamy filling, sprinkled with powdered sugar, on a wooden cutting board surrounded by autumn leaves and mini pumpkins.

Libby’s Pumpkin Roll: A Delicious Holiday Tradition   

Making a Libby’s Pumpkin Roll is like creating edible artit’s as delightful to behold as it is to eat. This iconic dessert features a spiced pumpkin cake rolled with a rich, creamy filling, making it a festive favorite for Thanksgiving, Christmas, and any autumn celebration. It’s a dessert that embodies the essence of the season, with its warm spices, velvety filling, and visually stunning presentation. Whether you’re new to baking or a seasoned pro, this guide will walk you through every detail, ensuring your pumpkin roll turns out perfect every time. From selecting the finest ingredients to mastering the art of the roll, we’ve got you covered. Let’s dive into the world of this irresistible holiday treat!

Part 1: What is Libby’s Pumpkin Roll?

The Magic of Libby’s Pumpkin Roll

Libby’s Pumpkin Roll isn’t just another cake—it’s a masterpiece that combines flavors, textures, and elegance. The soft, spiced pumpkin sponge cake provides a tender and moist foundation, while the tangy cream cheese filling offers a luscious contrast. Together, they create a dessert that’s as harmonious in taste as it is in appearance. Each slice reveals a mesmerizing swirl of golden pumpkin cake and creamy filling, making it a showstopper on any dessert table.

Beyond its taste, this dessert captures the spirit of fall in every bite. The warm spices—cinnamon, nutmeg, and cloves—evoke memories of crisp autumn days and cozy holiday gatherings. Libby’s Pumpkin Roll isn’t just a treat; it’s an experience that brings people together.

A Holiday Classic with a Story

Libby’s Pumpkin Roll has earned its place as a staple of festive celebrations, thanks to its rich history and timeless appeal. The key ingredient, Libby’s 100% pure pumpkin puree, has been a trusted pantry favorite since the 1920s. This convenient and high-quality product has helped home bakers create consistent and delicious results for decades.

The recipe itself embodies the nostalgic flavors of the holidays. With its warm spices and creamy filling, Libby’s Pumpkin Roll reflects the essence of family traditions, shared meals, and celebrations. Over the years, it has become more than a dessert—it’s a symbol of holiday cheer and culinary creativity.

Why Everyone Loves It

There are countless reasons why Libby’s Pumpkin Roll is adored by bakers and dessert lovers alike:

Visual Appeal: The rolled presentation is elegant and captivating, with every slice showcasing a perfect spiral of cake and filling.
Unmatched Flavor: The balance of spiced pumpkin cake and tangy cream cheese filling is a flavor profile that’s hard to resist.
Versatility: While it shines during holidays like Thanksgiving and Christmas, this dessert is suitable for any occasion, from casual gatherings to formal dinners.
Approachable for All Skill Levels: Although it looks sophisticated, Libby’s Pumpkin Roll is surprisingly simple to make with the right technique and guidance.
The sprinkle of powdered sugar on top adds a final touch of elegance, making it the perfect centerpiece for your dessert spread.

A Visual Feast for All Occasions

Libby’s Pumpkin Roll isn’t just a dessert; it’s a conversation starter. Its striking appearance makes it a standout addition to any table, whether you’re hosting a Thanksgiving dinner, attending a Christmas potluck, or simply treating yourself to a weekend baking project.

What’s more, its flavors are universally loved. The cake’s moist, spiced texture appeals to pumpkin enthusiasts, while the creamy filling satisfies those with a sweet tooth. It’s a dessert that bridges generations, bringing everyone together to enjoy the simple pleasures of home-baked goodness.

Now that we’ve explored what makes Libby’s Pumpkin Roll so special, let’s take a closer look at the key ingredients that bring this dessert to life.

Part 2: Ingredients for the Perfect Pumpkin Roll

Creating the perfect Libby’s Pumpkin Roll starts with the right ingredients, each playing a crucial role in achieving the moist cake and creamy filling we all love. Let’s take a deeper dive into what makes these components shine and how you can make them work for you.

Pumpkin Puree: The Star Ingredient

At the heart of this dessert is Libby’s 100% pure pumpkin puree, which provides the unmistakable pumpkin flavor and creamy texture. Its smooth consistency and robust flavor make it ideal for baking, ensuring your cake is moist and flavorful. Unlike homemade pumpkin puree, which can vary in texture and moisture content, Libby’s offers a dependable result every time.

For those who enjoy a DIY approach, homemade puree can be used, but it’s essential to strain it thoroughly to avoid excess moisture. However, for a foolproof pumpkin roll, Libby’s is the gold standard.

Warm and Fragrant Spices

The spices are what transform this dessert into an autumn masterpiece. A combination of cinnamon, nutmeg, and cloves creates the signature flavor profile that pairs so beautifully with the pumpkin. These spices not only enhance the cake’s taste but also fill your kitchen with the comforting aroma of the holidays.

Feel free to adjust the spice levels to suit your preferences. For an extra kick, you could even add a dash of ginger or cardamom for a unique twist.

Rich and Creamy Filling

The filling is where the magic happens. Made with cream cheese, butter, powdered sugar, and vanilla extract, it’s the luscious core of the roll that ties everything together. The tanginess of the cream cheese perfectly complements the sweet and spiced pumpkin cake, creating a flavor pairing that’s absolutely irresistible.

Want to experiment? Swap out cream cheese for mascarpone for a slightly sweeter and creamier filling, or add a hint of lemon zest or orange extract for a refreshing citrus note.

Optional Additions for a Personal Touch

While the classic Libby’s Pumpkin Roll is a masterpiece on its own, there’s always room for creativity. Here are some ideas to personalize your roll:

Nuts: Sprinkle chopped walnuts or pecans over the batter before baking for added texture and flavor.
Toppings: Dust the finished roll with powdered sugar for a traditional look, or drizzle it with a maple or vanilla glaze for an extra touch of sweetness.
Chocolate Chips: For chocolate lovers, add mini chocolate chips to the batter or filling for a decadent twist.
These small additions can elevate your dessert and make it uniquely yours.

Bringing It All Together
With these carefully selected ingredients, you’re well on your way to creating a pumpkin roll that’s as delightful to look at as it is to eat. Each component, from the pumpkin puree to the filling, plays a vital role in delivering the perfect texture and flavor.

Stay tuned for the next section, where we’ll guide you through the step-by-step process of turning these ingredients into a showstopping dessert.

This expanded version brings more detail and descriptive language, adding depth and making the content more engaging while increasing the word count.

Part 3: Step-by-Step Guide to Making Libbys Pumpkin Roll

Baker spreading cream cheese filling on a pumpkin cake layer using a spatula, in a warm kitchen setting.

Transforming a few simple ingredients into a flawless Libbys Pumpkin Roll is a rewarding process. Follow these steps to ensure success.

Preparing the Batter

Combine the dry ingredients—flour, baking powder, baking soda, spices, and salt—in a bowl. Separately, beat the eggs and sugar until thick and pale. Add the Libby’s pumpkin puree and mix until just combined. Slowly fold the dry mixture into the wet ingredients, being careful not to overmix, as this can make the cake dense.

Baking the Cake

Preheat the oven to 375°F and prepare a 15×10-inch jelly roll pan. Line it with parchment paper and grease lightly. Spread the batter evenly into the pan to ensure uniform thickness. Bake for 13-15 minutes, or until the cake springs back when touched. Avoid overbaking—it can make the cake brittle and prone to cracking​

Rolling the Cake
While the cake is still warm, loosen the edges and turn it onto a clean kitchen towel generously dusted with powdered sugar. Carefully peel away the parchment paper. Starting at the narrow end, roll the cake and towel together into a tight spiral. This step locks the shape, preventing cracks later. Allow it to cool completely on a wire rack​

Preparing the Filling
Beat softened cream cheese, butter, powdered sugar, and vanilla extract until smooth and fluffy. Ensure there are no lumps, as a smooth filling is crucial for spreading evenly. Taste and adjust sweetness as desired.

Assembling the Roll
Gently unroll the cooled cake and remove the towel. Spread the cream cheese mixture evenly over the surface, leaving a small border around the edges. Reroll the cake tightly, without the towel this time, and wrap it in plastic wrap to hold its shape.

Chilling and Serving
Refrigerate the roll for at least one hour—this firms the filling and makes slicing easier. Dust with powdered sugar before serving, and use a serrated knife for clean cuts. Each slice will showcase that stunning swirl of cake and filling, ready to impress​

Up next, we’ll explore tips and tricks to ensure your pumpkin roll turns out perfect every time!

Part 4: Tips for the Best Pumpkin Roll

Achieving a perfect Libbys Pumpkin Roll can be as simple as following these tips and solutions. From avoiding cracks to long-term storage, these expert techniques ensure a flawless dessert every time.

Avoiding Cracks in the Cake
Cracks are a common concern, but they’re preventable with proper technique. Always roll the cake while it’s warm—this keeps it pliable and easy to shape. Use a thin kitchen towel or parchment paper generously dusted with powdered sugar to prevent sticking. If the cake cools too much, it may stiffen and break, so work quickly after it comes out of the oven​

Preventing Stickiness
A sticky roll can ruin the look of the dessert. To combat this, dust the towel liberally with powdered sugar before rolling the cake. This creates a protective layer between the towel and the cake, ensuring an easy release later. For added security, you can also use parchment paper lightly sprayed with nonstick cooking spray​

mizing the Recipe**
For a unique twist, drizzle the top with a maple glaze or a light vanilla icing before serving. Prefer homemade pumpkin puree? While it can add a richer flavor, ensure it’s strained thoroughly to avoid excess moisture that could affect the cake’s texture. You can even sprinkle the filling with a pinch of cinnamon for an extra kick.
Keep the pumpkin roll fresh by wrapping it tightly in plastic wrap and refrigerating for up to five days. To freeze, wrap the roll in two layers of plastic wrap, followed by aluminum foil, to prevent freezer burn. Stored this way, it can last up to three months. Thaw overnight in the fridge before serving—it’ll taste as fresh as the day you made it.

Salt & Bakerro tips will ensure your Libbys Pumpkin Roll turns out picture-perfect, with all its flavors intact.


Part 5: Variations of Libbys Pumpkin Roll

Why stick to tradition when you can give your Libbys Pumpkin Roll a fun, creative spin? Here are a few delicious variations to suit any palate.

Add Chocolate Chips to the Batter
For a decadent touch, fold mini chocolate chips into the batter before baking. They melt slightly during baking, adding pockets of rich chocolate that complement the spiced pumpkin flavor perfectly.

Simply Happenings

rpone for the Filling**
Switching out cream cheese for mascarpone creates a creamier, slightly sweeter filling. Add a splash of orange extract for a refreshing citrus note that pairs wonderfully with pumpkin.

Salt & Baker and Gluten-Free Options**
Swap out traditional ingredients for plant-based or gluten-free alternatives. Use almond or oat flour for the cake, and replace eggs with a flaxseed mixture. For the filling, choose a dairy-free cream cheese alternative combined with powdered sugar and a hint of vanilla.

The Kitchen Magpieariations ensure that everyone can enjoy this classic dessert, whether they prefer a twist on tradition or dietary-friendly options. Up next, explore frequently asked questions to address common challenges!

Part 6: Frequently Asked Questions

Why does my pumpkin roll crack when rolled?
Cracks typically occur if the cake is rolled after it has cooled down. A warm cake is more flexible and less likely to break. To avoid this, roll the cake immediately after removing it from the oven. Dusting the towel with plenty of powdered sugar also helps prevent sticking, which can lead to tears.

Can I make Libbys Pumpkin Roll ahead of time?
Yes! In fact, making the roll a day or two ahead allows the flavors to meld beautifully. Prepare and assemble the roll, then wrap it tightly in plastic wrap and refrigerate. When you’re ready to serve, simply dust it with powdered sugar for a fresh presentation.

Do I have to refrigerate my pumpkin roll?
Absolutely. The cream cheese filling requires refrigeration to stay fresh and safe to eat. Keeping the roll chilled also helps maintain its shape and makes it easier to slice. Store it in an airtight container or wrap it tightly in plastic wrap for best results.

How do I prevent sticking to the towel?
Stickiness can be avoided by dusting the towel generously with powdered sugar before rolling the cake. The sugar acts as a barrier, making it easy to unroll without damage. Alternatively, some bakers prefer to use parchment paper dusted with sugar as a foolproof option.

Can I freeze my pumpkin roll, and how?
Freezing is a great way to preserve your pumpkin roll. Once it’s assembled, wrap the roll tightly in plastic wrap and a layer of aluminum foil to prevent freezer burn. It can be frozen for up to three months. When ready to serve, thaw the roll overnight in the refrigerator—it’ll taste just as fresh as when it was made.


Conclusion

Libbys Pumpkin Roll is more than just a dessert—it’s a cherished tradition that brings warmth and sweetness to any holiday table. Its delightful combination of spiced pumpkin cake and rich cream cheese filling makes it a crowd-pleaser, whether you’re hosting family or contributing to a festive potluck.

This timeless recipe offers endless opportunities for personalization, from adding chocolate chips to exploring dietary-friendly options. Whether you’re a first-time baker or a seasoned dessert enthusiast, the step-by-step process ensures success while the storage tips keep it fresh for days—or even months!

So why not give it a try? Create your own Libbys Pumpkin Roll, experiment with variations, and savor the delicious reward of your efforts. Share your creation with loved ones, and let it be the centerpiece of your holiday festivities. Trust us—this dessert will quickly become a tradition you’ll return to year after year.