Ultimate Guide to Making the Perfect Chicken Parm Sandwich

Chicken Parmesan sandwiches topped with marinara sauce and grated cheese, arranged in six stages of preparation on a white surface.

Learn how to create a mouthwatering chicken parm sandwich, from its origins to the ultimate recipe. Delight in crispy chicken, gooey cheese, and tangy marinara—all nestled between soft bread.

Introduction

The chicken parm sandwich is not just a sandwich; it’s a warm hug on a plate. With its origins in Italian-American cuisine, this comfort food has captured the hearts (and taste buds) of millions. In this guide, we’ll dive deep into the history, ingredients, preparation techniques, and variations of this beloved dish. Whether you’re a seasoned chef or a kitchen newbie, you’ll find tips to elevate your sandwich game.

Let’s get started with a closer look at this delicious classic!

Part 1: Introduction to Chicken Parm Sandwich

What Is a Chicken Parm Sandwich?

A chicken parm sandwich combines the best of two worlds: crispy, breaded chicken and the irresistible allure of a cheesy, saucy sandwich. Traditionally served on hoagie rolls or ciabatta bread, this dish is known for its savory layers of flavor. The breaded chicken breast is topped with rich marinara sauce and gooey mozzarella cheese, then broiled until perfectly golden.

But what truly sets this sandwich apart? It’s the balance of textures: crispy chicken, soft bread, and creamy cheese. No wonder it’s considered a quintessential comfort food!

Origin and History of the Chicken Parm Sandwich

The chicken parm sandwich owes its existence to the Italian-American adaptation of Chicken Parmesan. Chicken Parmesan itself is a variation of Italy’s classic eggplant Parmesan (or “parmigiana”). When Italian immigrants arrived in the U.S., they adapted their recipes using locally available ingredients. The Italian chicken sandwich emerged as a portable twist on this dish, perfect for a hearty, on-the-go meal.

Interestingly, its popularity grew alongside Italian-American delis and diners, where cooks experimented with turning traditional meals into handheld creations. Today, it’s a global favorite!

Part 2: Ingredients and Preparation

Essential Ingredients for a Perfect Chicken Parm Sandwich

Creating the perfect chicken parm sandwich starts with high-quality ingredients. Each component plays a crucial role in delivering that unforgettable taste and texture. Let’s break it down:

Chicken: Best Cuts and Preparation Methods

The star of this sandwich is the chicken. For maximum flavor and juiciness, boneless, skinless chicken breasts are the go-to choice. Thinly slice or pound them to ensure even cooking. When breaded and fried, they develop that signature crispy, golden crust that complements the sandwich perfectly.

Sauce: Homemade vs. Store-Bought Marinara

Marinara sauce ties the sandwich together with its tangy and slightly sweet flavor. While store-bought marinara can save time, homemade versions elevate the dish. A simple mix of crushed tomatoes, garlic, olive oil, and basil works wonders. For those pressed for time, check out this guide to an authentic Italian marinara recipe# Cheese: Mozzarella, Parmesan, and More
What’s a cheesy chicken sandwich without cheese? Shredded mozzarella provides that gooey texture, while grated Parmesan adds a nutty, salty kick. If you’re feeling adventurous, try adding provolone for an extra layer of flavor.

Bread: Ideal Types for the Perfect Bite

The bread serves as the foundation for the sandwich. A sturdy yet soft option, like ciabatta or a hoagie roll, is ideal. It should hold up to the marinara sauce without getting soggy. Lightly toasting the bread adds a touch of crunch and prevents it from becoming too soft.


How to Make a Classic Chicken Parm Sandwich

Ready to assemble a flawless crispy chicken parm ? Here’s a step-by-step guide:

Step 1: Preparing the Chicken
  1. Slice or pound chicken breasts to about ½-inch thickness.
  2. Coat the chicken in seasoned flour, then dip into beaten eggs.
  3. Press into breadcrumbs mixed with grated Parmesan, ensuring an even coating.
  4. Fry in hot oil until golden brown, about 3-4 minutes per side. Let the chicken rest on paper towels to drain excess oil.
2: Crafting the Marinara Sauce
  1. Sauté minced garlic in olive oil until fragrant.
  2. Add crushed tomatoes, a pinch of salt, and a dash of sugar.
  3. Simmer for 15 minutes, stirring occasionally. Toss in fresh basil leaves at the end for added freshness.
3: Assembling the Sandwich
  1. Spread marinara sauce over each half of the bread.
  2. Layer the fried chicken on the bottom half, then add shredded mozzarella and a sprinkle of Parmesan.
  3. Broil the sandwich open-faced for 2-3 minutes or until the cheese melts and bubbles.
  4. Place the top half of the bread on and serve immediately.

Variations of the Chicken Parm Sandwich

While the classic version is undeniably satisfying, there’s room for creativity:

  • Gluten-Free Option: Use almond flour for breading and serve on gluten-free rolls.
  • Keto-Friendly Twist: Skip the bread and use a lettuce wrap.
  • Vegetarian Alternative: Swap chicken for breaded eggplant or tofu.

Experimenting with these variations keeps the dish exciting and adaptable to different diets.

Part 3: Popular Chicken Parm Sandwich Recipes

Traditional Recipe: Chicken Parm Sandwich

This recipe captures the essence of a classic chicken parm sandwich. It’s simple, flavorful, and perfect for satisfying your cravings.

Ingredients
  • 2 boneless, skinless chicken breasts (pounded to ½ inch thick)
  • 1 cup all-purpose flour
  • 2 large eggs (beaten)
  • 1 cup Italian breadcrumbs
  • ½ cup grated Parmesan cheese
  • 1 cup marinara sauce (homemade or store-bought)
  • 1 ½ cups shredded mozzarella cheese
  • 2 hoagie rolls or ciabatta bread (lightly toasted)
  • 2 tbsp olive oil (for frying)
  • Fresh basil leaves (optional, for garnish)
Instructions
  1. Preheat the oven to 400°F (200°C).
  2. Prepare the Chicken: Dredge each chicken breast in flour, dip into the beaten eggs, and coat with a mixture of breadcrumbs and Parmesan cheese.
  3. Fry the Chicken: Heat olive oil in a skillet over medium heat. Fry the chicken until golden and cooked through, about 3-4 minutes per side.
  4. Assemble the Sandwich: Place the fried chicken on the bottom half of each roll. Top with marinara sauce and shredded mozzarella.
  5. Bake to Perfection: Arrange the sandwiches on a baking sheet and bake for 5-7 minutes, or until the cheese melts and bubbles.
  6. Serve: Garnish with fresh basil leaves and close the sandwiches. Serve hot!

Spicy Chicken Parm Sandwich Recipe

Craving something with a kick? This recipe spices up the classic with zesty flavors.

Ingredients
  • Same as the traditional recipe, with these additions:
    • 1 tsp red pepper flakes
    • 1 tbsp hot sauce (optional, added to marinara)
Instructions
  1. Follow the steps in the traditional recipe.
  2. Add red pepper flakes to the breadcrumb mixture before coating the chicken.
  3. Stir a tablespoon of hot sauce into the marinara for extra heat.
  4. Assemble and bake as instructed.

This version is ideal for those who enjoy bold, fiery flavors without compromising on the cheesy goodness!


Gourmet Take on the Chicken Parm Sandwich

Elevate your breaded chicken sandwich with premium ingredients and artisan touches.

Ingredients
  • Organic chicken breasts
  • Freshly baked sourdough rolls
  • Freshly grated Parmigiano-Reggiano
  • Homemade marinara with roasted cherry tomatoes
  • Smoked mozzarella cheese
Instructions
  1. Prepare the chicken as in the traditional recipe, but use organic meat for added tenderness.
  2. Make a gourmet marinara by roasting cherry tomatoes with olive oil, garlic, and thyme before blending them into a sauce.
  3. Assemble the sandwich using smoked mozzarella and bake until the cheese melts beautifully.

This recipe offers a refined version that’s sure to impress at dinner parties or special occasions.

Part 4: Where to Find the Best Chicken Parm Sandwich

Top Restaurants Known for Their cheesy chicken sandwich

If you’re craving an expertly made crispy chicken parm but don’t want to cook, several establishments are famous for their mouthwatering versions:

  • Parm NYC (New York City, NY): Known for their signature chicken parm hero, Parm NYC has perfected the art of blending crispy chicken, rich marinara, and fresh mozzarella on a soft roll.
  • Mama’s on the Hill (St. Louis, MO): This Italian-American favorite serves a generously sized sandwich with authentic flavors.
  • Tony’s Italian Deli (Chicago, IL): Tony’s offers a hearty, old-school Italian chicken sandwich that’s beloved by locals for its tangy sauce and crispy breading.

When visiting these hotspots, don’t forget to check their menus for unique spins on the classic sandwich!


Chicken Parm Sandwich Around the World

While the chicken parm sandwich has its roots in Italian-American cuisine, it has inspired variations globally:

  • Australia: Known as “parmi” or “parma,” Australians often serve it as an open-faced sandwich with fries.
  • United Kingdom: British gastropubs sometimes include a chicken parm-inspired sandwich featuring Cheddar cheese instead of mozzarella.
  • Japan: The Japanese version might feature panko-breaded chicken paired with katsu sauce, giving it a unique twist.

Exploring these international takes shows how versatile the chicken parm sandwich can be!


How to Choose a Great Chicken Parm Sandwich Locally

When dining out, finding a good cheesy chicken sandwich is all about knowing what to look for:

  1. Fresh Ingredients: Check for freshly made marinara sauce and cheese melted to perfection.
  2. Crispy Chicken: The breading should be crunchy and golden, not soggy or over-fried.
  3. Good Bread: A sturdy but soft roll ensures the sandwich holds together without overwhelming the filling.

Pro Tip: Look up reviews or ask locals for recommendations. Often, the best sandwiches come from hidden gems!

Part 5: Nutritional Facts and Tips

Is the Chicken Parm Sandwich Healthy?

The chicken parm sandwich is undeniably delicious, but you might wonder about its nutritional profile. Let’s break it down:

  • Calories: A typical sandwich ranges between 600–900 calories, depending on portion size and ingredients.
  • Protein: Thanks to the chicken and cheese, it provides a hearty dose of protein—approximately 30–40 grams per serving.
  • Fats: Breaded chicken and cheese contribute to a moderate fat content, often around 20–30 grams per sandwich.
  • Carbohydrates: The bread and marinara sauce add a significant carb count, usually between 50–70 grams.

While this isn’t a low-calorie meal, it’s packed with nutrients like calcium and iron. That said, occasional indulgence is perfectly fine as part of a balanced diet.


Healthier Alternatives Without Sacrificing Flavor

For those looking to enjoy a chicken parm sandwich without guilt, here are a few simple swaps:

  1. Bread: Use whole-grain rolls to add fiber and reduce refined carbs.
  2. Chicken: Opt for baked or air-fried chicken instead of frying to cut back on oil.
  3. Cheese: Go for part-skim mozzarella or reduce the quantity without compromising on flavor.
  4. Sauce: Make a low-sugar marinara by using fresh tomatoes and skipping added sugars.

Light Recipe: Healthier Chicken Parm Sandwich

Ingredients
  • 2 boneless, skinless chicken breasts (grilled or baked)
  • 2 whole-grain rolls
  • 1 cup low-fat marinara sauce
  • 1 cup part-skim mozzarella cheese
  • ¼ cup grated Parmesan cheese
  • Fresh spinach leaves (optional)
Instructions
  1. Grill or bake the chicken breasts until fully cooked.
  2. Assemble the sandwich with marinara, cheese, and chicken.
  3. Toast briefly in the oven to melt the cheese.
  4. Add fresh spinach for extra nutrients and serve warm.

This version keeps all the beloved flavors intact while making the sandwich lighter and more nutritious.

Part 6: FAQs About Chicken Parm Sandwich

What is the best cheese for a chicken parm sandwich?

The classic choice for a chicken parm sandwich is mozzarella, known for its creamy texture and excellent melting qualities. However, a sprinkle of Parmesan adds depth and saltiness, while provolone can provide a slightly sharper flavor. For a gourmet touch, try smoked mozzarella or a blend of cheeses to enhance the flavor profile.

Can I make a chicken parm sandwich ahead of time?

Yes, you can prepare the components in advance. Bread and fry the chicken, make the marinara sauce, and even slice the cheese ahead of time. Store each component separately to maintain freshness. When ready to serve, simply assemble and bake the sandwich to melt the cheese.

What sides pair well with a chicken parm sandwich?

The chicken parm sandwich shines alongside a variety of sides. Classic choices include fries, a Caesar salad, or roasted vegetables. For a lighter pairing, consider a side of steamed broccoli or a refreshing cucumber salad.

Is there a vegan version of the chicken parm sandwich?

Absolutely! Swap the chicken for breaded and baked eggplant or tofu. Use vegan mozzarella and Parmesan, and opt for a plant-based marinara sauce. These substitutions ensure the sandwich retains its signature flavor and texture while being entirely plant-based.

What bread works best for a chicken parm sandwich?

A sturdy yet soft bread, like ciabatta, hoagie rolls, or sourdough, is ideal for a chicken parm sandwich. These options hold up well under the weight of the chicken and sauce without becoming soggy. For added texture, lightly toast the bread before assembling.

Can I freeze a chicken parm sandwich?

Yes, but it’s best to freeze the breaded chicken separately from the other components. Once cooled, wrap the cooked chicken in foil or plastic wrap and freeze for up to 3 months. Reheat the chicken in the oven, then assemble the sandwich fresh for the best taste and texture.

Part 7: Conclusion and Final Thoughts

Why the Chicken Parm Sandwich Stands Out

The chicken parm sandwich is a culinary masterpiece that blends the rich, comforting flavors of Italian-American cuisine into a portable delight. Its irresistible combination of crispy breaded chicken, gooey melted mozzarella, tangy marinara, and hearty bread makes it a universally adored comfort food. Whether you stick to the classic recipe or experiment with gourmet variations, the sandwich is endlessly versatile and always satisfying.

Try Making One Today!

Now that you know the history, techniques, and recipes behind the chicken parm sandwich, it’s time to bring it to life in your own kitchen! Whether you’re a seasoned cook or a beginner, the step-by-step instructions provided here ensure success. Gather the best ingredients, follow the tips, and enjoy the pride of making a dish that’s as delicious as it is iconic.

Remember, food is about sharing joy and love, and the chicken parm sandwich embodies both in every bite. So, don’t wait—get started today and savor the magic of this timeless dish!

The Ultimate Guide to Beef Cheeks: Recipes, Tips, and Techniques

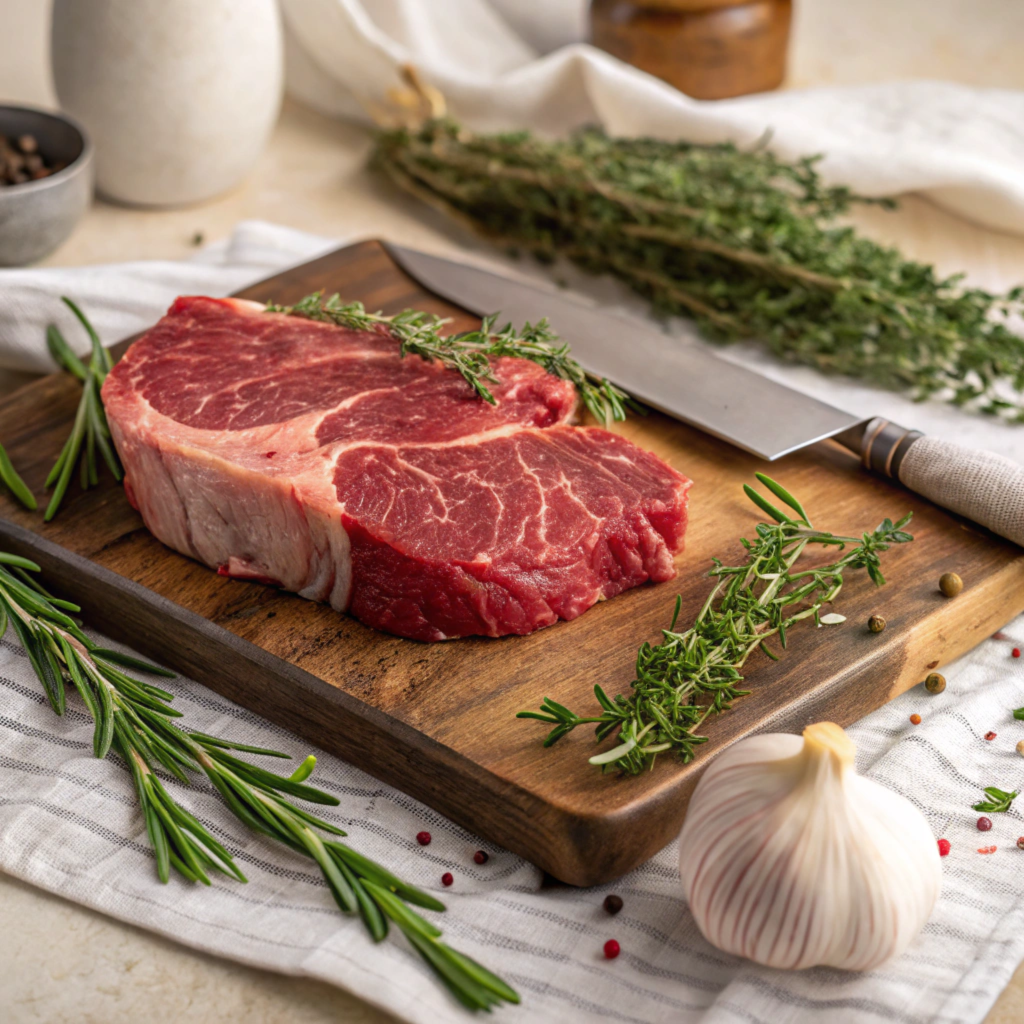
Beef cheeks are a culinary treasure often overlooked by many. With their rich flavor, tender texture, and versatility, they have become a favorite among chefs and home cooks alike. This guide will explore everything from what Facial meat cuts are to how to cook them perfectly.

What Are Beef Cheeks?

Beef cheeks are the facial muscles of cattle, known for their dense structure and high amount of connective tissue. This unique characteristic makes them ideal for slow cooking, allowing the collagen to break down and create an irresistibly tender and flavorful dish.

Key Characteristics of Beef Cheeks:

  • Flavor: Deep, beefy, and robust.
  • Texture: When cooked properly, they become melt-in-your-mouth tender.
  • Cost: Economical compared to other cuts of meat.
  • Versatility: Can be used in a variety of cuisines and dishes.

If you’ve never cooked with beef cheeks before, you’re in for a delightful experience. They are a staple in dishes like braises, stews, and even tacos.

Why Are Beef Cheeks So Popular?

In recent years, Cheek meat have gained immense popularity among food enthusiasts. This is largely due to their affordable price and the incredible results they yield when cooked properly. Their high collagen content makes them ideal for low and slow cooking methods like braising, which transforms them into tender, flavorful perfection.

Reasons Behind Their Popularity:

  • Health Benefits: Rich in protein, iron, and essential nutrients.
  • Sustainability: Utilizes a less common part of the animal, reducing food waste.
  • Culinary Trend: Featured in upscale restaurants, particularly in dishes like braised beef cheeks or osso buco substitutes.

Learn more about beef’s sustainability here.


How to Select the Best Beef Cheeks

Choosing quality beef cheeks is the first step to creating a memorable dish. Here’s what to look for:

  • Freshness: Opt for bright red beef cheeks with minimal discoloration.
  • Marbling: Look for a good amount of fat and connective tissue, which contributes to the flavor and texture during cooking.
  • Size: Uniformly sized cuts ensure even cooking.

When shopping, ask your butcher for help if needed. They can provide tips on trimming and preparation, ensuring you get the most out of this fantastic cut.


Cooking Cheek meat: Techniques and Tips

The Secret to Perfect Beef Cheeks

The secret lies in slow cooking. This method allows the connective tissues and collagen to break down, resulting in that luscious, fork-tender texture.

Popular Cooking Methods:

  • Braising: The most common method. Cook the beef cheeks in a flavorful liquid over low heat for several hours.
  • Slow Cooker: Ideal for hands-off cooking. Combine your ingredients, set the timer, and let the magic happen.
  • Pressure Cooking: Perfect for reducing cooking time while still achieving tenderness.
  • Smoking: Adds a unique, smoky flavor to the rich Cheek meat.

Recipe Ideas for Beef Cheeks

Ready to try your hand at cooking beef cheeks? Here are a few ideas to inspire you:

Braised Facial meat cuts

  • Ingredients: Beef jowls, beef stock, onions, garlic, carrots, celery, herbs.
  • Method: Sear the beef cheeks, sauté vegetables, add liquid, and simmer for 4-6 hours.

Beef Cheek Tacos

  • Ingredients: Shredded Cheek meat, tortillas, avocado, salsa, lime, cilantro.
  • Method: Slow-cook beef cheeks with spices, shred, and serve in warm tortillas.

Beef Cheek Ragu

  • Ingredients: Beef cheeks, tomatoes, garlic, onions, red wine, pasta.
  • Method: Braise beef cheeks in a tomato-based sauce and serve over pasta.

For more recipe inspiration, check out this collection of beef cheek dishes.


The Nutritional Value of Beef Cheeks

Beef cheeks aren’t just delicious—they’re also packed with nutrients. Here’s why they deserve a spot on your plate:

  • Protein: Essential for muscle growth and repair.
  • Iron: Vital for oxygen transport in the blood.
  • Collagen: Promotes skin health and joint support.
  • Low in Calories: A lean cut of meat when trimmed of excess fat.

Tips for Storing and Freezing Beef Cheeks

Proper storage ensures that your beef cheeks remain fresh and safe to eat.

Storing in the Refrigerator:

  • Keep them in an airtight container or vacuum-sealed bag.
  • Use within 2-3 days for the best quality.

Freezing Beef jowls:

  • Wrap tightly in plastic wrap or foil, then place in a freezer-safe bag.
  • Label with the date and use within 3 months.
  • Thaw in the refrigerator overnight before cooking.

Frequently Asked Questions (FAQs)

  1. What do beef cheeks taste like?
    • They have a rich, beefy flavor with a silky texture when slow-cooked.
  2. How long does it take to cook beef cheeks?
    • Typically 3-4 hours for braising, or 8-10 hours in a slow cooker.
  3. Can I cook beef cheeks in a pressure cooker?
    • Yes, they take about 45-60 minutes in a pressure cooker.
  4. Are beef cheeks healthy?
    • Yes, they are high in protein, iron, and collagen.
  5. What cuisines use beef cheeks?
    • Popular in Italian, French, Mexican, and Asian cuisines.
  6. How do I trim Beef jowls?
    • Remove excess fat and sinew with a sharp knife before cooking.
  7. Do beef cheeks shrink during cooking?
    • Yes, they reduce in size due to the breakdown of collagen.
  8. What is the best wine to use for braising beef cheeks?
    • A dry red wine like Cabernet Sauvignon or Merlot works best.
  9. Can I substitute Beef jowls with another cut?
    • Short ribs or oxtail are good substitutes.
  10. Where can I buy beef cheeks?
    • Look for them at local butcher shops or specialty meat markets.

Part 2: The Art and Science of Cooking Beef jowls

Cooking beef cheeks isn’t just a culinary task—it’s an art form that requires patience and technique. This part will delve into more advanced tips, pairing ideas, and cultural significance. By the end, you’ll be equipped to elevate your beef cheek dishes to restaurant-quality levels.


Advanced Tips for Cooking Beef Cheeks

Cooking beef cheeks perfectly is all about the details. Here are some advanced tips to help you master this cut:

1. Marinate for Maximum Flavor

  • Why it works: Marinating infuses the meat with additional flavors while tenderizing it.
  • Recommended marinades: A blend of red wine, garlic, rosemary, and olive oil works wonders.
  • How to do it: Let the beef cheeks sit in the marinade for 8-12 hours in the refrigerator.

2. Searing: Don’t Skip This Step

  • Purpose: Searing locks in juices and creates a caramelized crust that enhances the flavor.
  • Technique: Heat a heavy pan until smoking hot, then sear each side for 2-3 minutes.
  • Pro Tip: Use a neutral oil with a high smoke point, like grapeseed or canola oil.

3. Layer Flavors in Your Cooking Liquid

  • Use a combination of aromatics like onions, garlic, and celery.
  • Add acidity with tomatoes, vinegar, or wine.
  • Enhance depth with beef stock, soy sauce, or Worcestershire sauce.

4. Cook Low and Slow

  • Why it’s critical: This allows the collagen to break down, turning tough muscle into tender meat.
  • Ideal temperature: 300°F (150°C) in the oven or the low setting on a slow cooker.

5. Rest Before Serving

  • Let the cooked beef cheeks rest for 10-15 minutes before slicing or serving.
  • Resting redistributes the juices, ensuring a moist and flavorful bite.

Discover more about the science of braising meat.


Pairing Cheek meat with Sides and Drinks

A well-prepared beef cheek dish deserves the perfect accompaniments.

Ideal Side Dishes

  1. Creamy Mashed Potatoes: Their richness balances the beef’s intensity.
  2. Polenta: Soft polenta provides a velvety texture that complements the tender cheeks.
  3. Roasted Root Vegetables: Carrots, parsnips, and turnips bring sweetness and a rustic touch.
  4. Risotto: A hearty mushroom or saffron risotto pairs beautifully.

Drink Pairings

  • Red Wine: Full-bodied options like Malbec, Syrah, or Chianti.
  • Craft Beer: A stout or porter enhances the beef’s depth.
  • Non-Alcoholic: A robust herbal tea or sparkling grape juice.

Beef Cheeks in Global Cuisines

The humble beef cheek has found its way into kitchens around the world. Here’s how different cultures celebrate this cut:

1. Italian Cuisine

  • Dish: Brasato al Barolo (Cheek meat braised in Barolo wine).
  • Flavors: Earthy, rich, and aromatic.

2. French Cuisine

  • Dish: Daube de Boeuf (Provencal beef stew).
  • Flavors: Olive oil, garlic, and herbs like thyme and bay leaves.

3. Mexican Cuisine

  • Dish: Barbacoa (slow-cooked shredded beef cheeks).
  • Flavors: Smoky, spicy, and tangy, served with fresh tortillas.

4. Asian Cuisine

  • Dish: Soy-Braised Beef Cheeks.
  • Flavors: A blend of soy sauce, ginger, garlic, and star anise.

Explore more about global beef dishes here.


How to Achieve the Perfect Texture

The texture of beef cheeks is a true hallmark of their quality. Achieving that signature melt-in-your-mouth feel requires precision:

  1. Monitor Cooking Time
    • Overcooking can turn tender meat into mush.
    • Check for doneness by gently pressing with a fork; it should slide through effortlessly.
  2. Use the Right Cooking Liquid
    • Liquids rich in collagen, like bone broth, enhance the final texture.
    • Avoid too much water—it dilutes the flavor.
  3. Test Midway
    • Taste periodically to ensure the meat is absorbing the seasoning.

Cheek meat: A Budget-Friendly Gourmet Option

One of the best-kept secrets in the culinary world is how affordable beef cheeks are compared to other cuts like short ribs or brisket.

Why They’re Cost-Effective

  • Derived from a lesser-used muscle.
  • Often sold in bulk at local butcher shops or meat markets.

Pro Tip for Buying the dense muscle of a cow’s cheek

  • Ask for deals: Many butchers are happy to provide discounts on larger purchases.
  • Buy fresh, not frozen: This ensures better texture and flavor.

Sustainability and Beef Cheeks

By choosing Cheek meat, you’re making an environmentally conscious choice. This cut is part of the movement to utilize the entire animal, reducing waste and promoting sustainability.

How to Source Ethically:

  1. Purchase from local, grass-fed farms.
  2. Look for certifications like USDA Organic or Animal Welfare Approved.
  3. Support butchers who prioritize humane practices.

For insights into sustainable beef farming, visit Sustainable Table.


Storage Tips for Cooked Beef Cheeks

If you’ve got leftovers (lucky you!), here’s how to store them properly:

Refrigeration

  • Cool completely before storing.
  • Place in an airtight container.
  • Consume within 3 days for optimal flavor.

Freezing

  • Portion into smaller servings for convenience.
  • Store in freezer-safe bags with some cooking liquid to retain moisture.
  • Freeze for up to 3 months.

To reheat, gently warm on the stovetop with additional broth or sauce.


Elevating Beef Cheeks: Chef-Inspired Ideas

If you want to go beyond the basics, try these elevated approaches to beef cheeks:

  1. Beef Cheek Ravioli
    • Shred the braised cheeks and mix with ricotta cheese.
    • Stuff into fresh pasta and serve with a sage butter sauce.
  2. Smoked Beef Cheek BBQ
    • Smoke cheeks with hickory wood, then glaze with a tangy BBQ sauce.
  3. Beef Cheek Pie
    • Combine shredded beef cheeks with vegetables and gravy, then bake in a flaky pastry shell.

For creative spins on classic dishes, check out this recipe collection.


FAQs About Beef Cheeks

  1. Can I overcook beef cheeks?
    • Yes, overcooking can make them overly soft and unappealing.
  2. What’s the best way to trim beef cheeks?
    • Remove excess sinew and fat with a sharp knife.
  3. Are beef cheeks suitable for grilling?
    • They’re better suited for slow cooking methods due to their toughness.
  4. Can I substitute chicken stock for beef stock?
    • Yes, but beef stock provides a deeper flavor.
  5. Do I need to season beef cheeks heavily?
    • They benefit from bold flavors, but don’t overdo the salt.
  6. How do I reheat frozen beef cheeks?
    • Thaw overnight and reheat gently in a sauce or broth.
  7. Can I cook beef cheeks in the oven?
    • Absolutely! Use a Dutch oven for best results.
  8. What’s the shelf life of frozen beef cheeks?
    • Up to 3 months if properly stored.
  9. Do beef cheeks taste gamey?
    • No, they have a rich, clean beef flavor.
  10. What herbs pair well with beef cheeks?
    • Rosemary, thyme, and bay leaves are excellent choices.

Part 3: Mastering the dense muscle of a cow’s cheek – Expert Advice and Advanced Techniques

By now, you’ve explored the basics and advanced methods of cooking beef cheeks. In this final segment, we’ll dive into expert techniques, discuss how to host the ultimate dinner featuring beef cheeks, and answer the most pressing questions you might still have.


Expert Techniques for the Perfect Beef Cheeks

If you’re ready to elevate your beef cheek dishes to a professional level, these advanced techniques will help:

1. Sous Vide for Precision Cooking

  • Why it works: Sous vide allows for precise temperature control, ensuring perfectly tender beef cheeks every time.
  • How to do it:
    • Season the cheeks and seal them in a vacuum bag with aromatics.
    • Cook in a water bath at 185°F (85°C) for 12-18 hours.
    • Sear before serving to add a caramelized crust.

2. Infusing Smoke

  • Use a smoker or a smoking gun to add a layer of complexity to the beef cheeks.
  • Pair with wood chips like hickory or mesquite for bold flavors.

3. Finishing with a Glaze

  • Reduce the braising liquid to a syrupy consistency and glaze the beef cheeks during the last 10 minutes of cooking.
  • Popular glazes include balsamic reduction or a honey-soy mixture.

4. Experimenting with Spices

  • Go beyond traditional flavors and explore spices like cinnamon, cardamom, and cloves for a Moroccan-inspired twist.

Learn more about sous vide techniques.


Hosting the Ultimate Beef Cheek Dinner

A dinner centered around beef cheeks is guaranteed to impress your guests. Here’s how to plan the perfect evening:

1. Set the Menu

  • Starter: Begin with a light soup or salad, such as roasted beet salad with goat cheese.
  • Main: Serve braised beef cheeks with creamy polenta and roasted vegetables.
  • Dessert: Opt for something decadent yet light, like a lemon tart or panna cotta.

2. Presentation Tips

  • Serve the beef cheeks on a platter with a drizzle of the reduced braising liquid.
  • Garnish with fresh herbs like parsley or thyme for a pop of color.

3. Drink Pairings

  • A robust red wine, such as a Zinfandel or a Bordeaux, will complement the dish perfectly.
  • Offer a sparkling water with lemon as a non-alcoholic option.

Innovative Ways to Use Leftover BEEF CHEEKS

Leftovers don’t have to be boring. Here are some creative ways to repurpose the dense muscle of a cow’s cheek

  1. Beef Cheek Sliders
    • Shred the beef cheeks and serve on mini buns with pickles and slaw.
  2. Cheek and Cheese Pizza
    • Use shredded beef cheeks as a pizza topping along with caramelized onions and mozzarella.
  3. Beef Cheek Pot Pie
    • Combine leftovers with vegetables and gravy, then bake with a flaky crust.
  4. Asian-Inspired Noodle Bowls
    • Add shredded beef cheeks to ramen or udon noodles with a savory broth.
  5. Beef Cheek Quesadillas
    • Layer shredded beef with cheese and jalapeños in a tortilla.

Explore more leftover recipe ideas.


The Legacy of Beef Cheeks in Culinary History

Beef cheeks have been cherished in cuisines for centuries. Here’s a brief look at their historical significance:

  • Ancient Rome: Slow-cooked meats, including cheek cuts, were a staple in Roman feasts.
  • Medieval Europe: the dense muscle of a cow’s cheek were common in stews for peasants, as they were inexpensive yet filling.
  • Modern Times: Thanks to their versatility and depth of flavor, beef cheeks are now featured in Michelin-starred menus worldwide.

This historical context adds to their appeal as a timeless ingredient.


Final FAQs About Beef Cheeks

Here are 10 additional FAQs to ensure you’ve got every detail covered:

  1. What is the best way to reheat beef cheeks without drying them out?
    • Reheat in a covered dish with some reserved braising liquid at low heat.
  2. Can I use beef cheeks in a curry?
    • Absolutely! Their richness works well with Indian or Thai curry spices.
  3. How do I know if my beef cheeks are cooked perfectly?
    • Insert a fork; the meat should shred easily without resistance.
  4. What is the average weight of a beef cheek?
    • Typically, each cheek weighs about 12-16 ounces.
  5. Is it necessary to use wine for braising beef cheeks?
    • No, you can use beef stock or tomato-based liquids as alternatives.
  6. How long can cooked Cheek meat stay in the fridge?
    • Up to 3 days in an airtight container.
  7. Can the dense muscle of a cow’s cheek be cooked from frozen?
    • It’s better to thaw them first for even cooking.
  8. What kind of knife is best for trimming beef cheeks?
    • A sharp boning or utility knife works best.
  9. Do gourmet Cheek meat need to be flipped during cooking?
    • No, as long as they are fully submerged in the cooking liquid.
  10. Can I pair beef cheeks with seafood?
    • Yes, a surf-and-turf dish featuring scallops or shrimp can work beautifully.

Conclusion

Beef cheeks are a culinary gem that can transform a humble meal into a gourmet experience. Whether you’re slow-cooking them in a braise, experimenting with sous vide, or adding them to innovative dishes, their depth of flavor and melt-in-your-mouth texture make them a standout choice.

With the right techniques, thoughtful pairings, and a touch of creativity, beef cheeks can become the centerpiece of unforgettable meals. From their historical roots to their modern-day resurgence, they truly deserve a spot on your table.

Now that you’ve mastered everything about gourmet Cheek meat, it’s time to get cooking and savor the results!

Seafood Bake Delight: A Flavor-Packed One-Pan Feast

Introduction to Seafood Bake

A seafood bake is a delightful medley of fresh ocean treasures, roasted together with vibrant vegetables, herbs, and spices, all brought to life with the warmth of an oven. Rooted in coastal traditions, it’s a versatile dish that seamlessly blends simplicity with bold flavors. At its core, a seafood bake is about celebrating the natural essence of ingredients like shrimp, scallops, lobster, and clams, often paired with hearty potatoes, sweet corn, and aromatic seasonings.

What makes a seafood bake so appealing is its adaptability. Whether you’re hosting a lively gathering or craving a comforting solo dinner, this dish offers endless possibilities. For instance, you can choose a buttery, garlicky base for a classic approach or opt for a zesty, spicy twist to elevate the flavors. With minimal effort yet maximum taste, a seafood bake is the perfect way to bring the essence of coastal comfort to your table, time and time again.

Moreover, this dish is incredibly accommodating to different preferences and dietary needs. Whether you prefer a rich and creamy version or a lighter, Mediterranean-inspired bake, the flexibility of this dish makes it perfect for any occasion. From casual dinners to festive celebrations, seafood bakes can be customized to suit your guests’ tastes, ensuring that everyone leaves the table satisfied.

Historical Background of Seafood Bakes

Seafood bakes trace their origins to coastal communities where access to fresh seafood was plentiful, and communal cooking brought people together. For instance, in North America, the dish is closely tied to New England clambakes, a centuries-old tradition. Here, clams, lobster, and other shellfish were steamed over hot stones and layered with seaweed, emphasizing the simplicity and natural flavors of the ingredients.

Interestingly, similar practices can be seen in other parts of the world. In the Mediterranean, seafood bakes are an integral part of the region’s culinary heritage. Using local ingredients like olive oil, garlic, tomatoes, and herbs such as oregano, Mediterranean seafood bakes are aromatic and full of fresh, vibrant flavors. The consistent theme across these global variations is the celebration of shared meals and the bounty of the sea.

In addition to New England and Mediterranean styles, other regions have their own versions of seafood bakes. For instance, in the Caribbean, seafood bakes often incorporate bold spices like cumin, paprika, and Scotch bonnet peppers, creating a distinctly spicy and aromatic flavor profile. These variations showcase the diversity of seafood bakes, as they evolve to reflect regional preferences, seasonal ingredients, and cultural traditions.

Common Ingredients in a Seafood Bake

A seafood bake typically includes a variety of fresh ocean-inspired ingredients, paired with hearty sides and flavorful seasonings to create a perfectly balanced dish. To start, key seafood options such as shrimp, crab, scallops, and fish fillets like cod or haddock offer a delightful range of textures and flavors. Next, supporting ingredients like tender potatoes, sweet corn, and colorful seasonal vegetables such as bell peppers or zucchini enhance the dish’s heartiness while adding vibrant pops of color.

To elevate both flavor and texture, many recipes incorporate buttery breadcrumbs for a crisp, golden topping. Furthermore, cream-based sauces or flavorful broths often add richness and depth, making the dish irresistibly indulgent. Fresh herbs like parsley, dill, or thyme, combined with aromatics such as garlic and lemon, provide a bright, zesty balance that ties all the elements together.

When it comes to sourcing ingredients, fresh seafood is always ideal for optimal flavor and texture. However, frozen options can also work well when properly thawed, offering a convenient and reliable alternative. For the best results, aim to choose high-quality ingredients from local markets or trusted suppliers. By carefully selecting quality seafood, vegetables, and seasonings, you can ensure a seafood bake that is both satisfying and delicious every time.

Furthermore, consider adding a layer of creativity by experimenting with different flavor profiles or unexpected ingredients. For example, a touch of saffron or smoked paprika can transform a traditional seafood bake into a vibrant, aromatic experience. Additionally, you can swap out potatoes for other root vegetables like sweet potatoes or carrots for a different twist.

Equipment Needed

To prepare a seafood bake, essential tools include a sturdy baking dish or casserole pan, which will comfortably hold all the ingredients while ensuring even cooking. A good-quality baking dish will ensure that your seafood bake cooks uniformly, producing a beautifully crisp top and tender seafood. Additionally, a mandolin slicer is helpful for creating thin, uniform slices of vegetables like potatoes or zucchini, ensuring consistency in texture.

A nonstick skillet is also necessary for sautéing aromatics and seafood before baking, as it prevents sticking and ensures even browning. Furthermore, a large spoon or spatula will be needed for gently stirring the ingredients to avoid damaging the delicate seafood. If you plan to make a sauce for your bake, a saucepan will be required to simmer the broth or cream until it reaches the desired consistency.

For added convenience, you may also consider using optional gadgets, such as a seafood cracker for cracking shells or a garlic press for quick mincing. These tools can help speed up the preparation process, allowing you to focus on the more creative aspects of the dish. Furthermore, a citrus juicer can come in handy for efficiently squeezing fresh lemon, streamlining the prep process and saving time. These tools can make your cooking experience more efficient and enjoyable.

Step-by-Step Guide to Preparing a Seafood Bake

1. Preparation of Seafood

Begin by preparing your seafood. First, peel and devein the shrimp, removing the shells and tails. This step is crucial for creating a cleaner, more enjoyable eating experience. For scallops, trim away the tough muscle, ensuring a tender texture. If you’re using crabmeat, be sure to drain it thoroughly and pick through it to remove any shell fragments. For fish fillets, cut them into evenly sized portions to ensure consistent cooking.

Additionally, pat your seafood dry with paper towels to remove excess moisture, as this helps achieve better browning and prevents the dish from becoming watery. While it may be tempting to skip this step, taking the time to remove moisture from the seafood will significantly improve the texture and presentation of the finished dish.

2. Layering and Assembling

Preheat your oven to 375°F (190°C). While the oven heats up, lightly grease your baking dish with butter or cooking spray to prevent sticking. Once prepared, start by layering the bottom of the dish with hearty vegetables like sliced potatoes or sweet corn. These ingredients will cook slowly, creating a stable base for the seafood.

Afterward, arrange the seafood evenly on top of the vegetables, taking care to distribute it well for even cooking. Season generously with salt, pepper, garlic, and fresh herbs like thyme, rosemary, or parsley. For added richness, drizzle a creamy sauce or melted butter over the seafood, ensuring that it is well-coated. Finally, for that perfect golden crust, sprinkle a generous layer of breadcrumbs or crushed crackers on top. This step is key to achieving the delightful crunch that makes seafood bakes so irresistible.

3. Baking Tips

Once assembled, place the dish in the preheated oven and bake for 25-35 minutes, or until the seafood is opaque and flaky, and the breadcrumbs have developed a crispy, golden crust. It’s essential to check the seafood periodically to ensure it doesn’t overcook, as this can lead to a dry, rubbery texture. If the breadcrumbs are browning too quickly, you can cover the dish with foil and continue baking for the remaining time.

To check for doneness, insert a fork into the thickest part of the seafood. It should flake easily and have an opaque appearance. If the seafood is done but the topping hasn’t reached the desired level of crispness, you can switch the oven to broil for the last few minutes. This will give the top a golden, crispy finish without overcooking the seafood.

Variations of Seafood Bake

1. New England-Style with Cracker Topping

A classic variation of seafood bake is the New England-style, which incorporates a buttery mixture of crushed saltine crackers or buttery breadcrumbs. In this version, the seafood—typically a blend of clams, lobster, and shrimp—forms the base, and the cracker topping provides a delightful crunch. The rich cream-based sauce brings moisture and flavor, ensuring the seafood remains tender. This version is perfect for those who love a comforting, indulgent twist on the classic seafood bake.

2. Mediterranean-Inspired Bake

For a lighter and more aromatic alternative, try a Mediterranean-inspired seafood bake. This variation features a mix of fish fillets, shrimp, and scallops, seasoned with olive oil, garlic, lemon, and fresh herbs like oregano, basil, or thyme. Thinly sliced fennel and juicy tomatoes are added to give the dish a touch of sweetness and earthiness. The result is a vibrant, fragrant bake that captures the fresh, savory flavors of the Mediterranean, offering a refreshing change from the traditional.

3. Dairy-Free and Gluten-Free Adaptations

For those with dietary restrictions, seafood bakes can easily be modified. To make it dairy-free, substitute butter and cream with olive oil, coconut milk, or a dairy-free cream alternative, which will provide the richness without the dairy. For a gluten-free version, simply replace traditional breadcrumbs with gluten-free breadcrumbs, or for a more inventive approach, use crushed almonds or pecans for a crunchy topping. Both adaptations maintain the dish’s comforting essence, allowing everyone to enjoy a flavorful seafood bake without compromising dietary needs. These variations are just as delicious as the original, proving that a few tweaks can cater to various preferences.

Pairing Suggestions for a Complete Meal

To complement the richness of a seafood bake, consider pairing it with light, refreshing sides that help balance the dish’s savory flavors. For instance, a crisp, mixed green salad with a tangy vinaigrette can provide the perfect contrast. You can also serve the dish with crusty bread, which is ideal for soaking up any delicious sauces that may accumulate in the baking dish.

When it comes to beverages, chilled white wines like Sauvignon Blanc or Chardonnay are excellent choices to pair with seafood, as they bring a refreshing acidity that complements the delicate flavors. Alternatively, for those who prefer non-alcoholic options, sparkling water with a splash of lemon adds a refreshing contrast. Light beers, such as pilsners or wheat beers, can also pair beautifully with seafood, providing a clean, crisp finish to each bite.

Frequently Asked Questions

1. What seafood works best in a bake?

A variety of seafood can work beautifully in a seafood bake. Shrimp, scallops, crab, lobster, and firm white fish like cod or haddock are excellent choices. Additionally, clams, mussels, or even oysters can add extra flavor and texture. A combination of these seafood varieties will create a balanced, flavorful dish.

2. Can I use frozen seafood?

Yes, frozen seafood is a great option. Be sure to thaw it completely before using it in your bake. Once thawed, pat the seafood dry with paper towels to remove any excess moisture. This step will prevent the seafood from releasing too much water during baking, ensuring a perfectly cooked dish.

3. How do I store and reheat leftovers?

Leftovers should be stored in an airtight container in the refrigerator for up to 2-3 days. To reheat, cover the dish with foil and bake it at 350°F (175°C) for 10-15 minutes, or until heated through. Alternatively, you can reheat it in the microwave, although the topping may lose its crispiness. For best results, consider reheating in the oven to retain the texture.

4. Alternatives for wine or cream in recipes?

If you don’t wish to use wine in your recipe, you can substitute it with a flavorful broth (chicken, vegetable, or seafood). For the cream, coconut milk or a dairy-free cream alternative can provide a similar richness without the dairy.

5. Can I make a seafood bake ahead of time?

Absolutely! You can prepare a seafood bake up to 24 hours in advance. Simply assemble the dish, cover it tightly with plastic wrap or foil, and refrigerate. When you’re ready to cook, bake directly from the fridge, no need to thaw.

Pro Tips for the Perfect Seafood Bake

To enhance the flavor of your seafood bake, try using broths, spices, and wine reductions. A flavorful broth (seafood, chicken, or vegetable) serves as a great base for the sauce, while a reduced wine can add depth. Season generously with spices like smoked paprika, cayenne pepper, or Old Bay seasoning to enhance the natural flavors of the seafood.

For the perfect topping, combine breadcrumbs with chopped nuts like almonds or pecans for an extra layer of texture. If desired, mix in some Parmesan cheese for added richness and flavor. For best results, bake at a moderate temperature to achieve a perfectly golden and crispy crust without overcooking the seafood.

Troubleshooting Common Issues

1. Avoiding Overcooked Seafood

Overcooked seafood is a common issue, but it’s easy to prevent. Check the seafood periodically by gently pressing it with a fork. It should flake easily and turn opaque. If overcooked, seafood can become tough and rubbery. To ensure it stays tender, err on the side of undercooking slightly, as the residual heat will continue to cook the seafood once removed from the oven.

2. Fixing Watery or Dry Casseroles

If your seafood bake turns out watery, it could be due to excess moisture in the seafood or vegetables. To avoid this, make sure you thoroughly drain and pat your seafood dry before baking. You can also use vegetables with lower water content, such as bell peppers or zucchini. On the other hand, if your seafood bake turns out too dry, it could be due to overbaking or insufficient liquid. Add more broth or cream next time to ensure a moist, flavorful result.

Conclusion

A seafood bake is a versatile, flavorful dish that can be customized to suit your tastes and dietary needs. Whether you stick with the classic recipe or explore new ingredients, this dish is sure to impress. It’s perfect for casual dinners, festive gatherings, or even weeknight meals. With a few simple adjustments, you can create a seafood bake that’s both comforting and delicious, offering a variety of flavors and textures with every bite. The ease of preparation and the flexibility of ingredients make it a go-to recipe that guarantees satisfaction for every occasion.