Tiramisu is a dessert that speaks of indulgence, sophistication, and rich Italian heritage. Its irresistible combination of coffee-soaked ladyfingers, creamy mascarpone, and a dusting of cocoa powder makes it a crowd favorite across the globe. Whether you’re a seasoned baker or a curious home cook, this guide will teach you how to make the perfect tiramisu from scratch.
What is Tiramisu? Origins and Popularity
Tiramisu, which translates to “pick me up” in Italian, perfectly describes the dessert’s energizing combination of espresso and sugar. It originated in the Veneto region of Italy during the 1960s and has since become a staple in restaurants and home kitchens worldwide. Its popularity lies in its simple preparation, luxurious flavor profile, and versatility in accommodating different tastes.
Ingredients Needed for Traditional Tiramisu
Creating an authentic tiramisu starts with assembling high-quality ingredients. Here’s what you’ll need for a traditional recipe:
Key Ingredients: Mascarpone, Ladyfingers, and Coffee
- Mascarpone Cheese: This creamy Italian cheese is the heart of tiramisu. It provides the rich, silky texture essential for the dessert.
- Ladyfingers (Savoiardi): These sponge-like biscuits absorb the coffee mixture without losing their structure, creating the perfect base.
- Espresso or Strong Coffee: The bold, slightly bitter notes of espresso balance the dessert’s sweetness.
Optional Add-Ons: Variations in Flavors and Liquor Choices
To personalize your tiramisu, consider these options:
- Liquors: Marsala wine, Amaretto, or Kahlúa add a delightful boozy touch.
- Flavor Variations: Add vanilla, orange zest, or a sprinkle of cinnamon for a unique twist.
- Sweeteners: Use raw sugar or honey for a slightly different sweetness profile.
Essential Kitchen Tools for Tiramisu Preparation
Before diving into the recipe, make sure your kitchen is equipped with these essential tools:
Mixing Bowls, Electric Mixer, and Baking Dish
- Mixing Bowls: A set of large and medium bowls for whisking and mixing.
- Electric Mixer: Whips eggs and mascarpone into a smooth, fluffy consistency effortlessly.
- Baking Dish: A square or rectangular dish (approximately 9×9 inches) works best for layering.

Tips for Selecting the Best Ingredients
The quality of your tiramisu depends heavily on the ingredients you choose. Here are some expert tips:
How to Choose Quality Mascarpone and Espresso
- Look for mascarpone with a smooth, creamy texture. Avoid grainy or overly firm options.
- For espresso, freshly brewed coffee offers the most authentic flavor. Use a high-quality espresso bean to ensure rich, aromatic results.
The Importance of Fresh Eggs and High-Quality Cocoa Powder
- Always use the freshest eggs possible, especially since traditional tiramisu includes raw eggs. Pasteurized eggs are a safer alternative.
- Choose unsweetened cocoa powder with a deep, rich color for the topping. This small detail enhances both flavor and presentation.
Prepping the Ladyfingers: To Soak or Not to Soak?
Ladyfingers are the backbone of tiramisu’s structure. Proper preparation is crucial to achieving the right texture.
- Soak lightly: Quickly dip each ladyfinger in the coffee mixture for about 2–3 seconds. Over-soaking can cause them to disintegrate, leading to a soggy dessert.
- Balance is key: Ensure the ladyfingers are moist but still firm enough to maintain their shape when layered.
How to Make Tiramisu: Step-by-Step Guide
Tiramisu Recipe
Now that we’ve covered the basics and preparation for making tiramisu, it’s time to dive into the detailed step-by-step process. With a little patience and care, you’ll create a dessert that looks and tastes amazing. Let’s get started!
Step 1: Brewing the Coffee or Espresso Base
A good tiramisu starts with a strong coffee base. This layer is essential for adding depth to the dessert’s flavor.
Using Fresh Espresso for Authentic Flavor
- Brew 2 cups of fresh espresso or use strong black coffee if an espresso machine isn’t available.
- Let the coffee cool to room temperature to avoid over-softening the ladyfingers during assembly.
- Add 2–3 tablespoons of sugar and, optionally, 1–2 tablespoons of liquor (such as Marsala wine or Kahlúa) to the coffee mixture. Stir until dissolved.
Transitioning smoothly to the next step, while the coffee cools, let’s prepare the mascarpone cream mixture.
Step 2: Preparing the Mascarpone Cream Mixture FOR Tiramisu Recipe
This creamy layer is the heart of tiramisu. Follow these steps to ensure it’s light and fluffy.
Combining Eggs, Sugar, and Mascarpone
- Separate 4 large eggs, placing the yolks in one mixing bowl and the whites in another.
- Using an electric mixer, beat the yolks with ½ cup of sugar until the mixture is pale yellow and creamy.
- Gently fold 1 pound (16 ounces) of mascarpone cheese into the egg yolk mixture, ensuring no lumps remain.
- In a clean bowl, whisk the egg whites to stiff peaks, then gently fold them into the mascarpone mixture. This step gives the cream its airy texture.
As we move on, this cream will become the star of the layering process.
Step 3: Assembling the Layers of Tiramisu Recipe
Layering is where the magic happens. It’s also where precision is key to achieving the perfect texture and balance.
Soaking Ladyfingers: Proper Timing and Techniques
- Quickly dip each ladyfinger into the cooled coffee mixture for 2–3 seconds.
- Place the soaked ladyfingers in a single layer at the bottom of your baking dish. They should be moist but not falling apart.
Layering Ladyfingers and Mascarpone Mixture
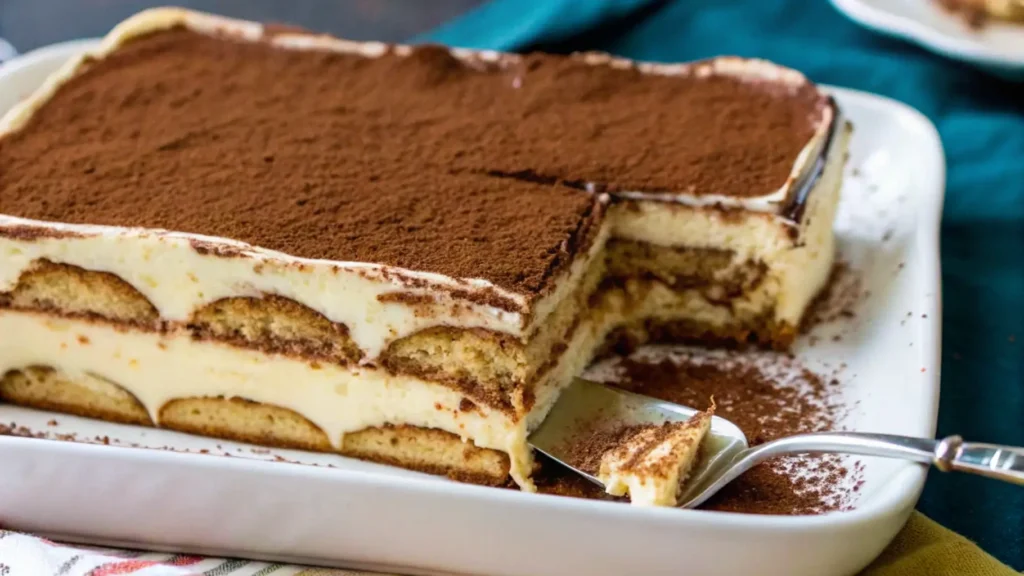
- Spread half of the mascarpone cream mixture evenly over the first layer of ladyfingers.
- Repeat the process by adding a second layer of soaked ladyfingers on top of the cream.
- Finish with the remaining mascarpone cream, smoothing it out with a spatula for an even surface.
Transitioning to the final touches, let’s add the signature cocoa dusting.
Step 4: Dusting with Cocoa Powder
This finishing step adds the classic look and a subtle bitterness that complements the creamy sweetness.
Achieving a Professional Look
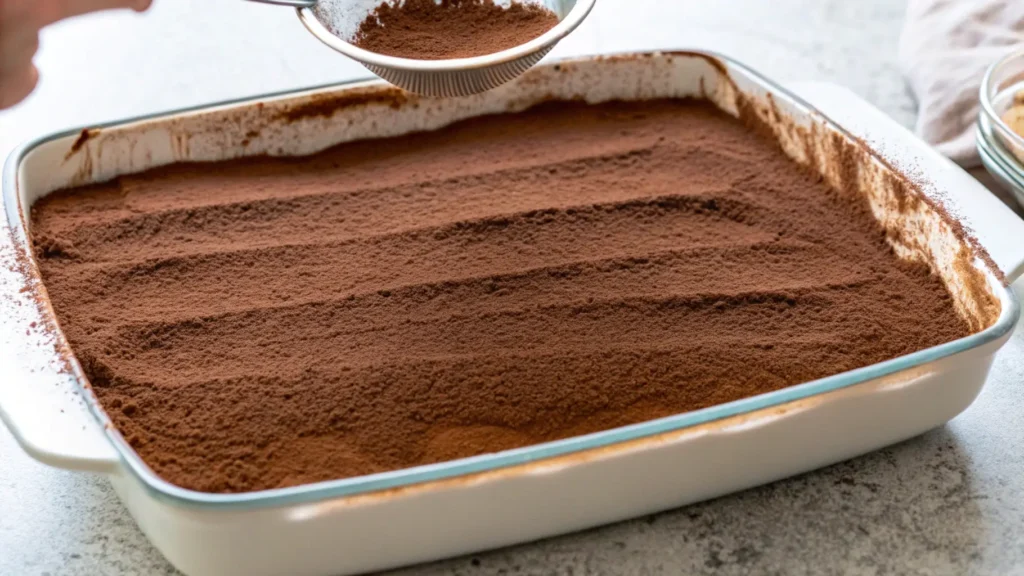
- Use a fine mesh sieve to evenly dust unsweetened cocoa powder over the top layer of mascarpone cream.
- For added flair, sprinkle chocolate shavings or add a light drizzle of melted chocolate.
Once the cocoa powder is perfectly in place, the dessert needs time to set.
Step 5: Refrigerating the Tiramisu
Patience is critical for a perfectly set tiramisu recipe. Refrigeration allows the flavors to meld and the layers to firm up.
Ideal Chilling Time for Perfect Texture for the best Tiramisu Recipe
- Cover the dish with plastic wrap and refrigerate for at least 6 hours, but overnight is even better.
- Avoid freezing unless you plan to serve it much later, as this can alter the creamy texture.
Now that your tiramisu is chilling, let’s review some common mistakes to avoid.

Common Mistakes to Avoid When Making Tiramisu
Even with careful preparation, a few pitfalls can affect your final result. Here’s how to avoid them:
Over-Soaking Ladyfingers and Other Pitfalls
- Over-soaking: This can make the dessert soggy. A quick dip is all that’s needed.
- Lumpy cream: Always fold the mascarpone gently into the egg yolk mixture to avoid lumps.
- Skipping the chilling process: The flavors need time to develop, so don’t rush this step.
With these tips in mind, you’re now equipped to make a flawless tiramisu.
Taking Tiramisu to the Next Level: Variations and Tips
Now that you know how to make a classic tiramisu, it’s time to explore creative variations and expert tips to elevate your dessert to the next level. With just a few tweaks, you can adapt this Italian favorite to suit any occasion, dietary need, or personal preference. Let’s dive in!
Tiramisu Variations from Around the World
Tiramisu’s versatility makes it a perfect canvas for culinary creativity. By introducing new ingredients, you can transform it into something entirely unique.
Chocolate Tiramisu, Berry Tiramisu, and More
- Chocolate Tiramisu: Swap the coffee base for chocolate milk or hot cocoa, and add layers of chocolate ganache or chocolate chips for extra indulgence.
- Berry Tiramisu: Use a fruit syrup (such as raspberry or strawberry) instead of coffee and fold fresh berries into the mascarpone mixture.
- Matcha Tiramisu: Replace cocoa powder with matcha powder and use green tea for soaking the ladyfingers. The result is a light, earthy dessert with a modern twist.
Transitioning to a simpler version, let’s explore an alcohol-free option that’s great for kids and non-drinkers.
Alcohol-Free Tiramisu: Kid-Friendly Option
If you want to enjoy tiramisu without any alcohol, don’t worry—it’s easy to adapt.
- Replace the liquor in the coffee mixture with a splash of vanilla extract or orange juice for a sweet, aromatic alternative.
- Use decaffeinated coffee for a completely kid-friendly dessert.
This way, everyone in the family can enjoy a slice of this delicious treat. Next, let’s talk about how to serve tiramisu in creative ways.
Creative Presentation Ideas for Tiramisu
While a traditional tiramisu is served in a large dish, you can make it more visually appealing with creative serving ideas.
Individual Servings in Glass Jars or Cups
- Prepare the tiramisu in small glass jars, parfait cups, or ramekins for individual servings.
- Layer the ingredients as usual but use smaller portions to create a charming and portable dessert.
These single-serving tiramisus are perfect for parties, picnics, or gifts. Moving forward, let’s see how you can pair tiramisu with drinks to enhance the experience.
Pairing Tiramisu with Drinks
Tiramisu pairs beautifully with a variety of beverages, from hot drinks to dessert wines. The right pairing can elevate the dessert’s flavors and create a memorable experience.
Coffee, Dessert Wines, and Liqueurs
- Coffee: Serve tiramisu with a fresh cup of espresso or cappuccino for a harmonious flavor match.
- Dessert Wines: Sweet wines like Moscato or Vin Santo complement tiramisu’s creamy richness.
- Liqueurs: A small glass of Amaretto or Baileys Irish Cream adds a sophisticated touch.
With these pairing options, tiramisu becomes even more enjoyable. Now, let’s look at how to store and preserve this dessert.
Tips for Storing and Freezing Tiramisu
Sometimes, you may have leftovers or want to prepare tiramisu in advance. Proper storage is key to maintaining its texture and taste.
Can You Freeze Tiramisu? Best Practices
- Refrigeration: Tiramisu keeps well in the fridge for up to 3 days. Cover tightly with plastic wrap to prevent it from drying out.
- Freezing: Yes, you can freeze tiramisu! Assemble the dessert in a freezer-safe container, wrap it in plastic, and store it for up to 2 months. Thaw in the fridge overnight before serving.
Freezing is especially helpful if you’re preparing for a special occasion. Speaking of which, let’s discuss how to make tiramisu lighter for health-conscious eaters.
How to Make Tiramisu Healthier: Light Variations
If you’re looking for a lighter version of tiramisu, you can easily make a few substitutions without sacrificing flavor.
- Use low-fat mascarpone or Greek yogurt instead of traditional mascarpone.
- Substitute the sugar with a natural sweetener like honey or stevia.
- Choose whole-grain ladyfingers for added fiber and nutrition.
These changes can make tiramisu more suitable for those watching their calorie intake. Finally, let’s consider how to make tiramisu the highlight of your next holiday or party.
Serving Suggestions for Holidays and Parties
Tiramisu’s elegance makes it a great choice for celebrations. To make it more festive:
- Add themed decorations, such as cocoa powder stencils in holiday shapes (e.g., stars or snowflakes).
- Top with edible gold flakes or sugar pearls for an extra touch of luxury.
- Serve alongside other desserts like biscotti or panna cotta for an Italian-themed dessert table.
With these ideas, tiramisu will surely impress your guests.
Frequently Asked Questions About Tiramisu
Let’s wrap up with answers to common questions about tiramisu:
1. Troubleshooting Runny Cream or Hard Layers
- Why is my cream runny? This happens if the mascarpone wasn’t folded gently or if the egg whites weren’t whipped to stiff peaks.
- Why are my ladyfingers too hard? They may not have been soaked long enough. Adjust the dipping time slightly.
2. Can Tiramisu Recipe Be Made Without Eggs?
Yes, you can make egg-free tiramisu by:
- Replacing the egg yolks with whipped cream for a similar richness.
- Using a vegan mascarpone alternative for a plant-based version.
3. Is Tiramisu Safe to Eat for Pregnant Women?
If using raw eggs, pregnant women should avoid it unless pasteurized eggs are used. An egg-free recipe is a safer choice.
4. How Long Can Tiramisu Sit Out?
Tiramisu should not sit out for more than 2 hours at room temperature due to its dairy content.
5. Can I Make Tiramisu in Advance?
Yes, it’s even better when prepared a day ahead, as the flavors have time to develop.
6. What’s the Best Dish for Tiramisu?
A glass or ceramic dish is ideal, as it allows for even layering and easy serving.
7. Can I Add Whipped Cream to the Tiramisu Recipe?
Yes, adding whipped cream makes the mascarpone mixture lighter and creamier.
8. How Do I Cut Perfect Slices?
Chill the tiramisu thoroughly and use a sharp knife wiped clean between cuts.
9. Can I Use Store-Bought Ladyfingers?
Absolutely! Store-bought ladyfingers save time and work well in this recipe.
10. What’s the Best Cocoa Powder for Tiramisu Recipe?
Choose high-quality, unsweetened cocoa powder for a rich and authentic finish.
